Deploy Node.js, Python & Go Projects Without Docker
Tired of Docker draining your laptop battery and eating up 4GB+ RAM just to run a simple Node.js app? You're not alone. While Docker is great for production, it's often overkill for local development—slowing down your iteration speed and complicating what should be simple tasks.
FlyEnv provides a better way. As a native environment manager, it lets you deploy and manage Node.js, Python, Go, and other projects using pure binaries—no containers, no virtualization overhead. With project-level environment isolation, your runtime versions automatically switch when you cd into different directories. Combined with built-in reverse proxy, automatic SSL, and one-click tunneling, you get production-like local development without the Docker complexity.
This guide walks you through deploying a Next.js project (the principles apply to Python Flask/Django, Go apps, and more) using FlyEnv's customizable modules.
Why Deploy Without Docker?
| Feature | Docker Desktop | FlyEnv Native |
|---|---|---|
| Memory Usage | 2-4 GB overhead | Near-zero overhead |
| Cold Start | 10-30 seconds | Instant (< 1s) |
| Disk Space | 10+ GB for images | Only the runtime binaries |
| Port Conflicts | Manual mapping required | Automatic detection & management |
| Version Switching | Rebuild containers | Instant per-project switching |
Prerequisites
- FlyEnv installed on your macOS, Windows, or Linux machine
- A Node.js/Python/Go project ready to deploy (or follow our Next.js example)
- Basic understanding of your project's startup command
Step 1: Create Your Project (Next.js Example)
If you already have a project, skip to Step 2.
- Open FlyEnv and navigate to the Node.js module
- Click the "New Project" tab
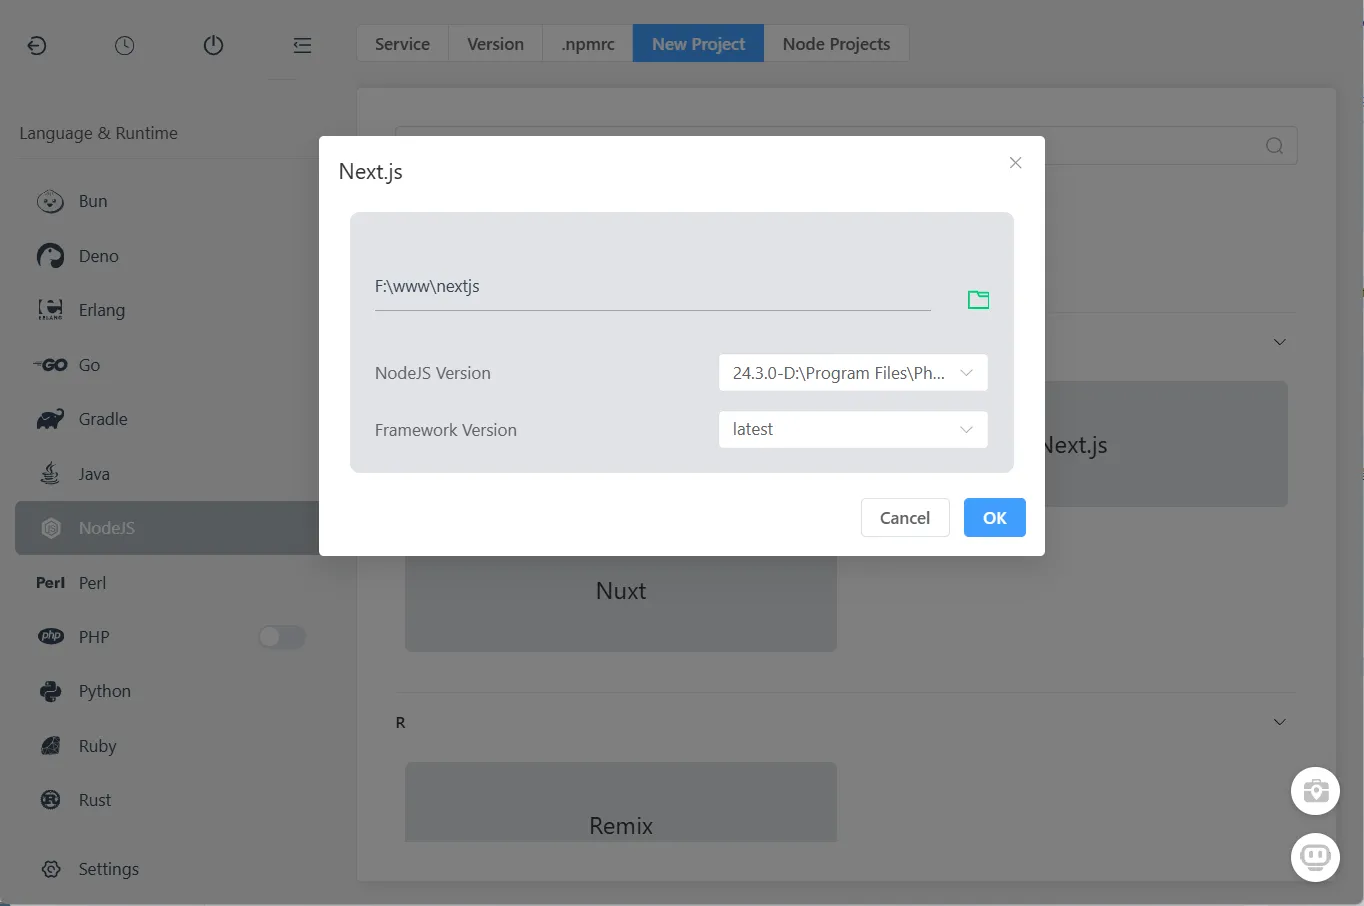
- Select Next.js from the templates
- Choose your project directory and complete the creation
Once created, install dependencies and build:
cd "/path/to/your/nextjs-project"
npm install
npm run build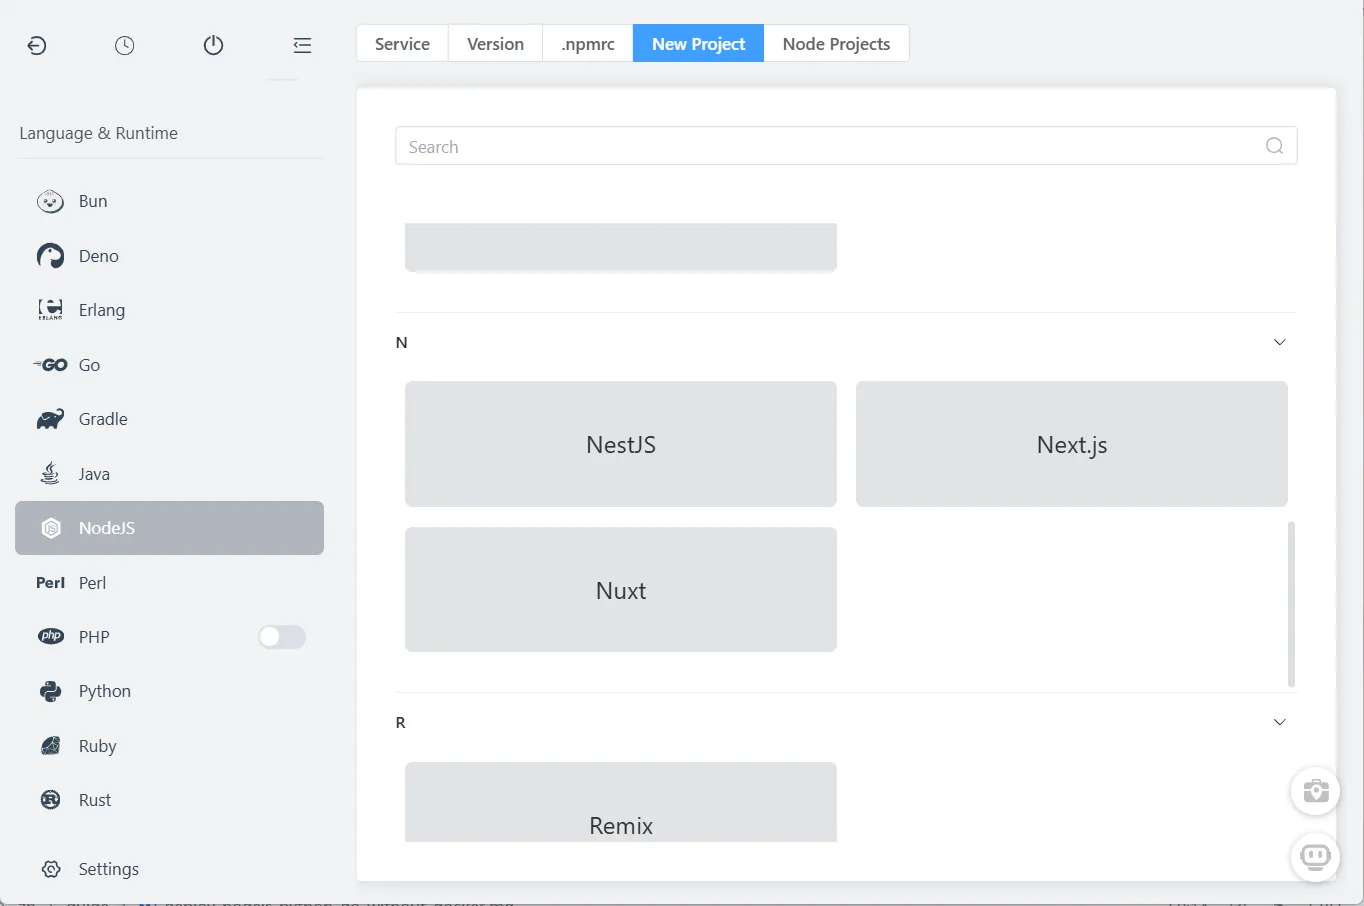

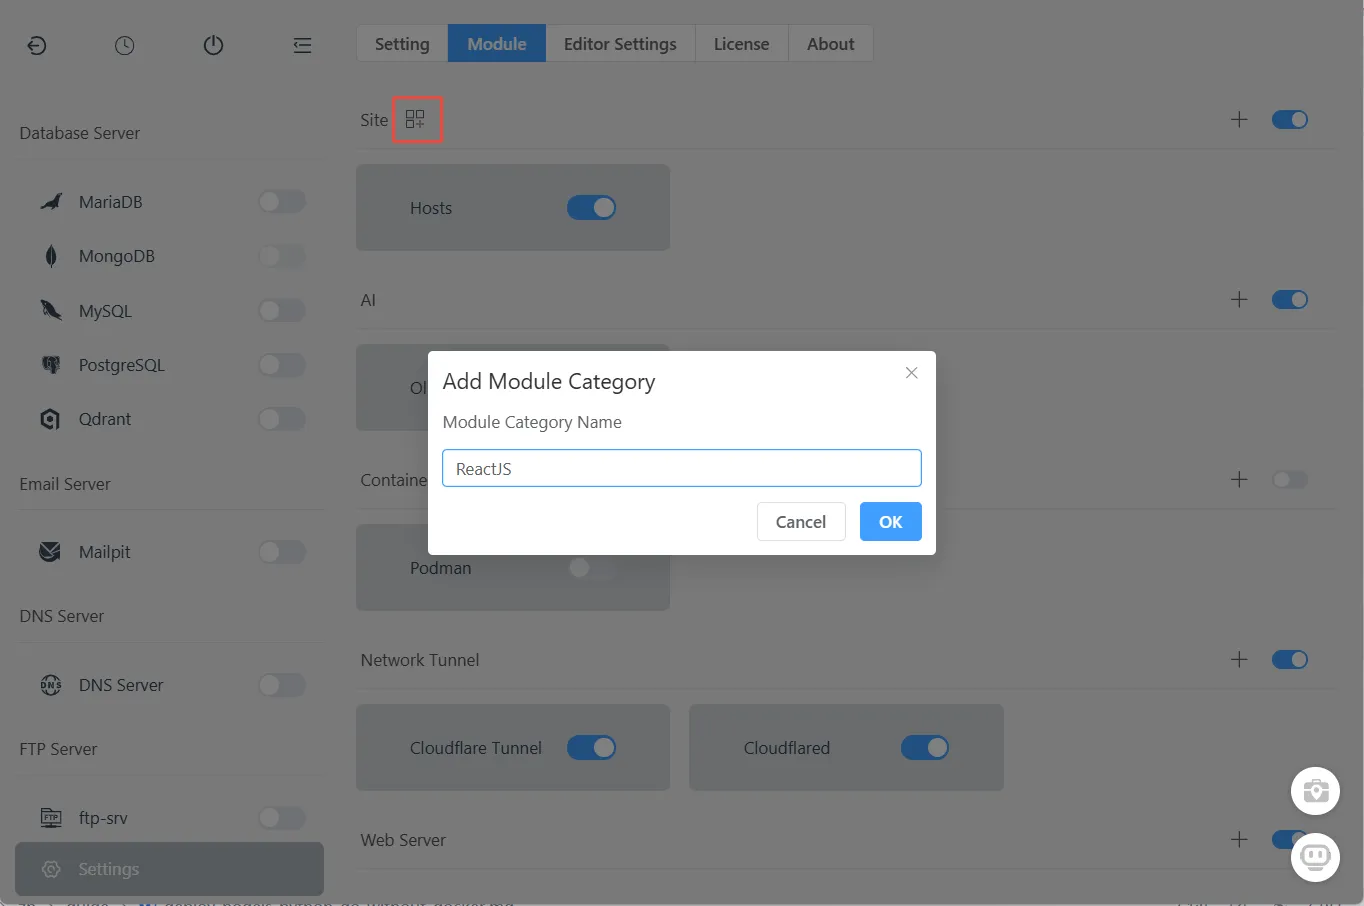
Step 2: Create a Custom Module Category
FlyEnv organizes projects through customizable modules. Think of them as folders for different tech stacks (ReactJS, Python, Go, etc.).
- Go to Settings → Modules
- Click the "+" icon next to "Sites" to create a new category
- Enter a name (e.g.,
ReactJS,PythonApps, orGoServices) - Click OK to create
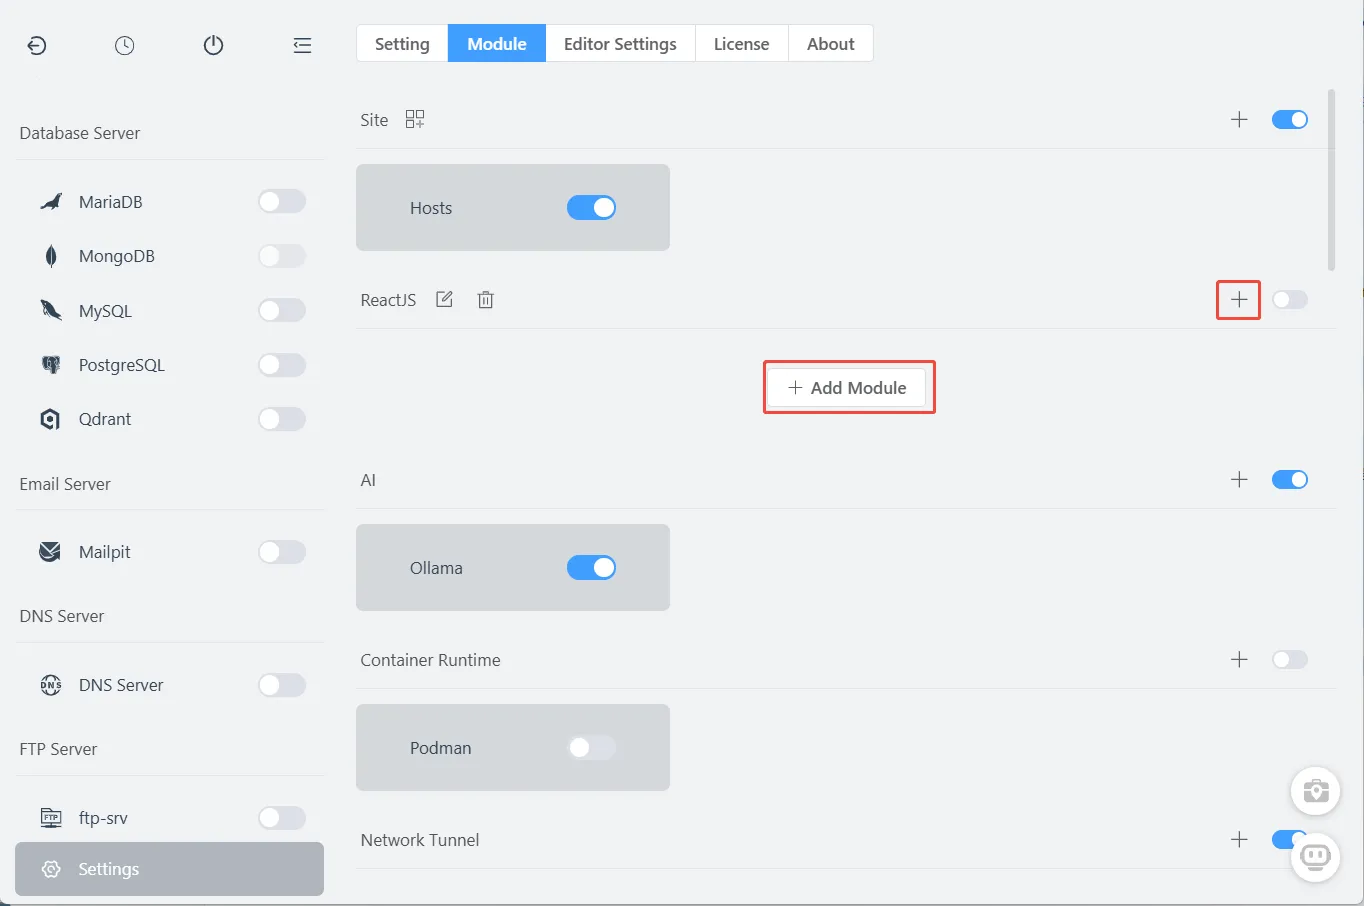
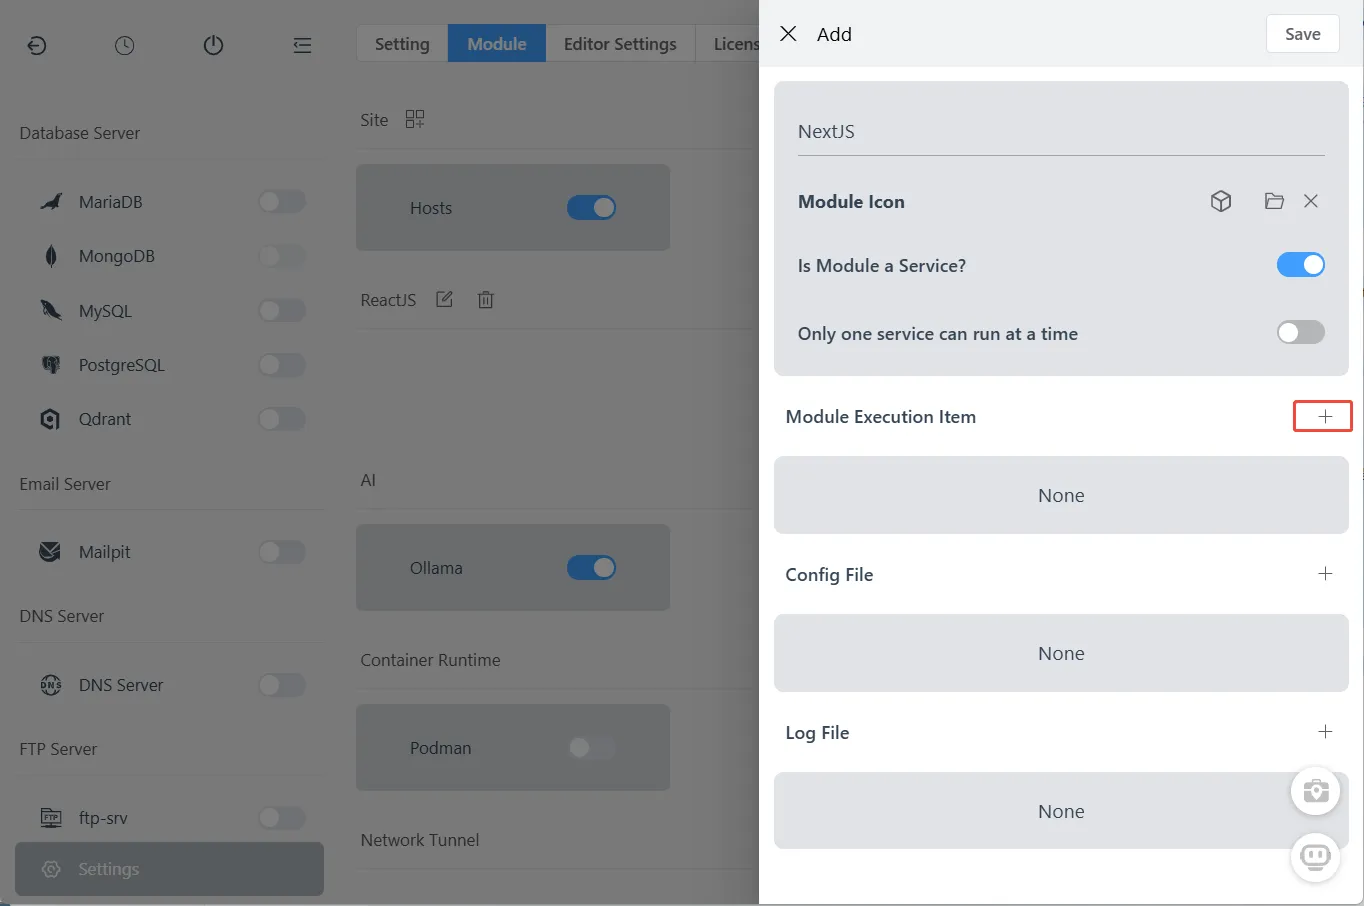
Step 3: Add a Project Entry
Under your new category, click "Add" to create a project entry:
Configuration Options Explained:
| Option | Description | Recommendation |
|---|---|---|
| Run as Service | FlyEnv manages start/stop state with toggle controls | ✅ Enable for most projects |
| Single Instance | Prevents multiple versions running simultaneously | ✅ Enable if projects share ports |
| Executables | The actual projects/commands to run | Add your project here |
| Config Files | Displayed as tabs in the main panel | Optional |
| Log Files | Viewable directly in FlyEnv | Optional |
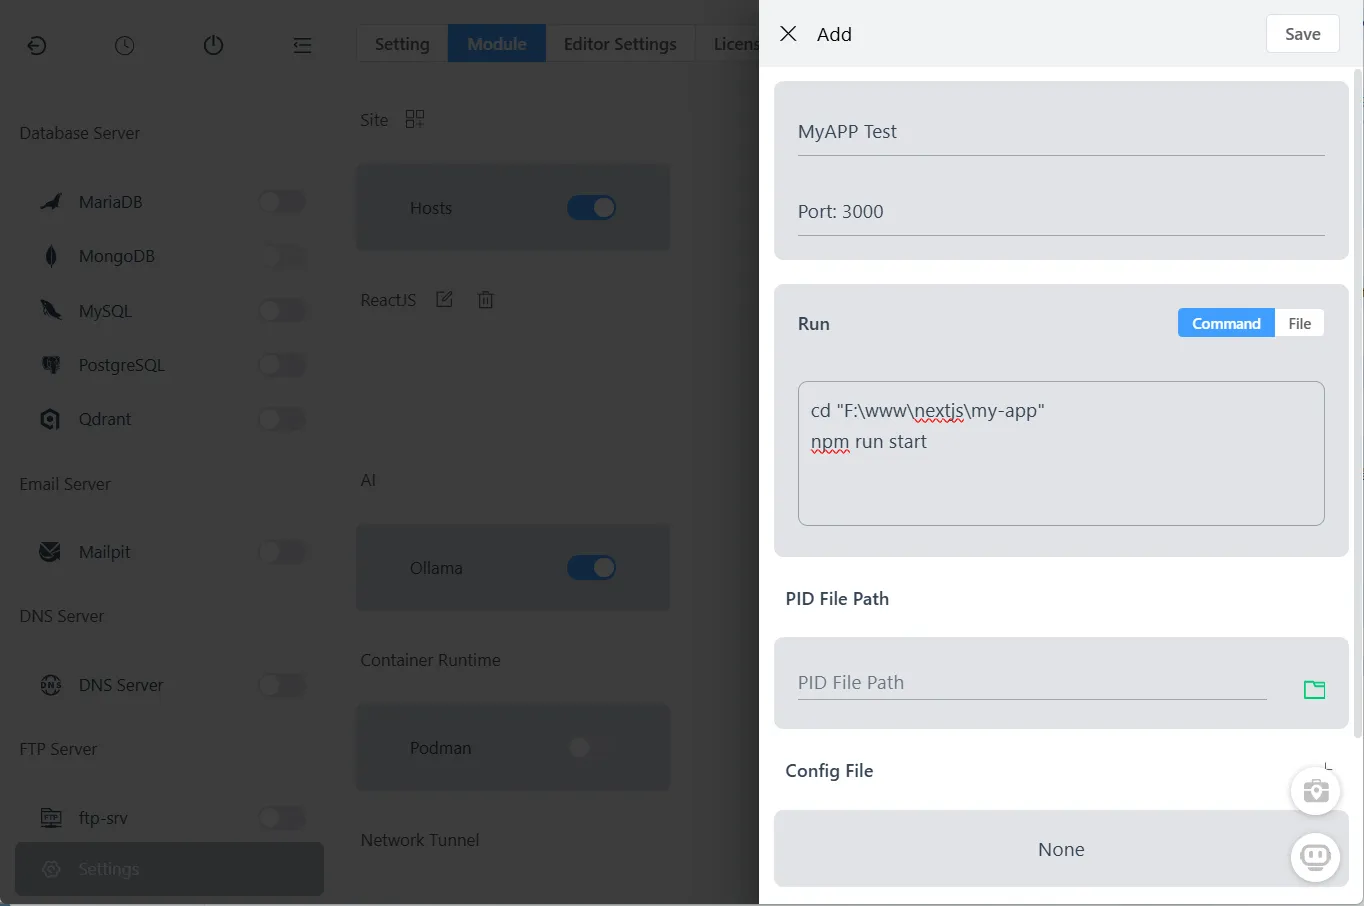
Step 4: Configure Your Project Command
Under "Executables", click "Add" to configure how your project runs:
Required Fields:
- Name: Your project name (e.g.,
My Next.js Blog) - Notes: Add the port number here (e.g.,
Port: 3000) for easy conflict detection - Run with sudo (macOS/Linux only): Enable if your project needs elevated permissions
- Command/File: The shell command or script file to execute
Example Commands:
Next.js (macOS/Linux):
cd "/Users/username/projects/my-app"
npm run start
Next.js (Windows PowerShell):
cd "F:\www\nextjs\my-app"
npm run start
Python Flask:
cd "/path/to/flask-app"
source venv/bin/activate
flask run --port=5000
Go Application:
cd "/path/to/go-app"
go run main.go
Optional Fields:
- PID File Path: For service state monitoring (if your project creates a PID file)
- Config Files: Add configuration files for in-app editing
- Log Files: Specify log paths for integrated log viewing
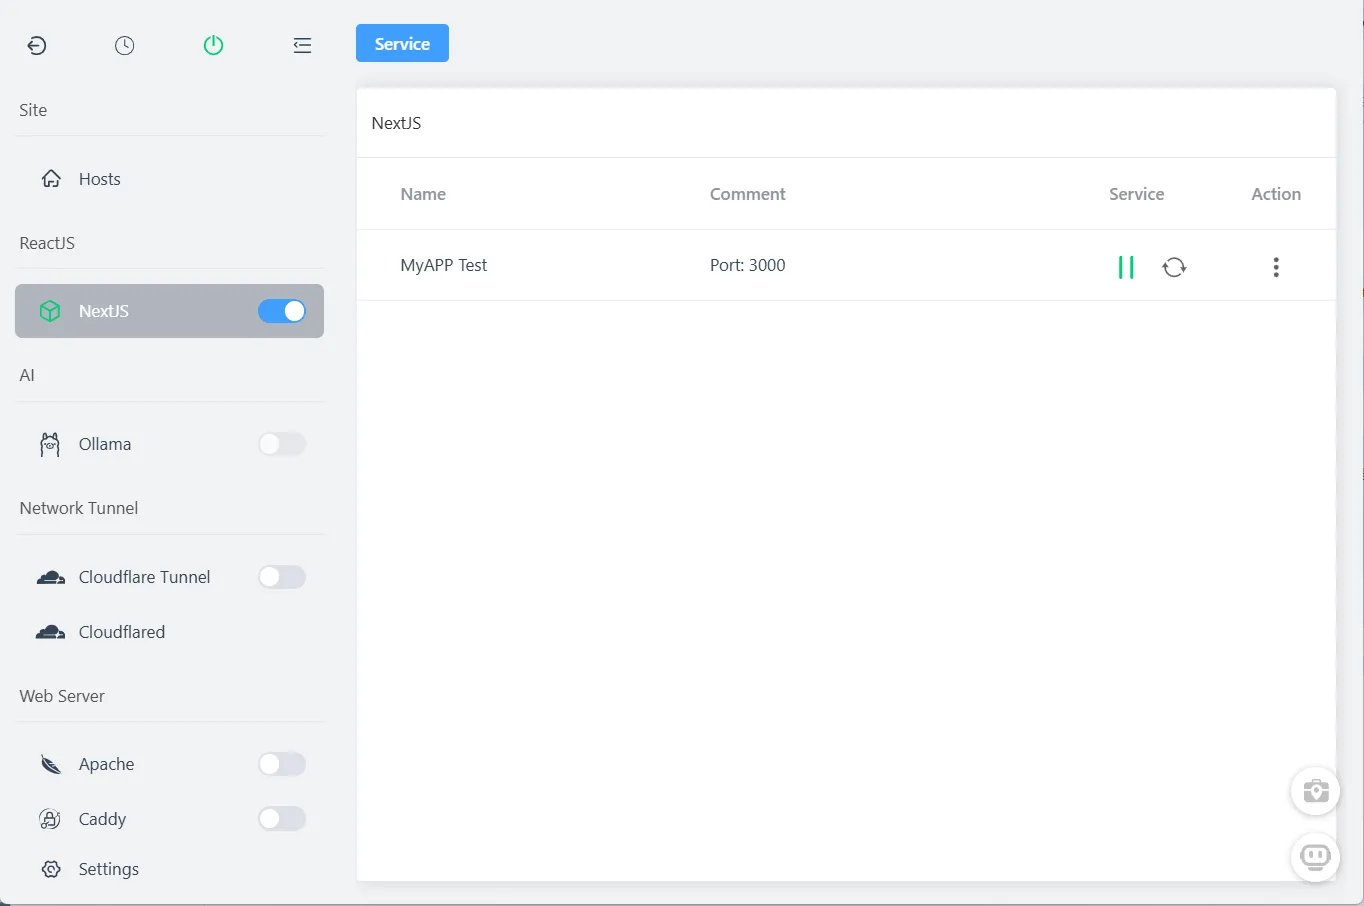
Step 5: Access Your Custom Module
Your new module appears in the left sidebar. Click it to see the management interface:

Step 6: Start Your Application
Click the "Start" button next to your project entry:
Step 7: Verify It's Running
Open your browser and visit the local address (e.g., http://127.0.0.1:3000):

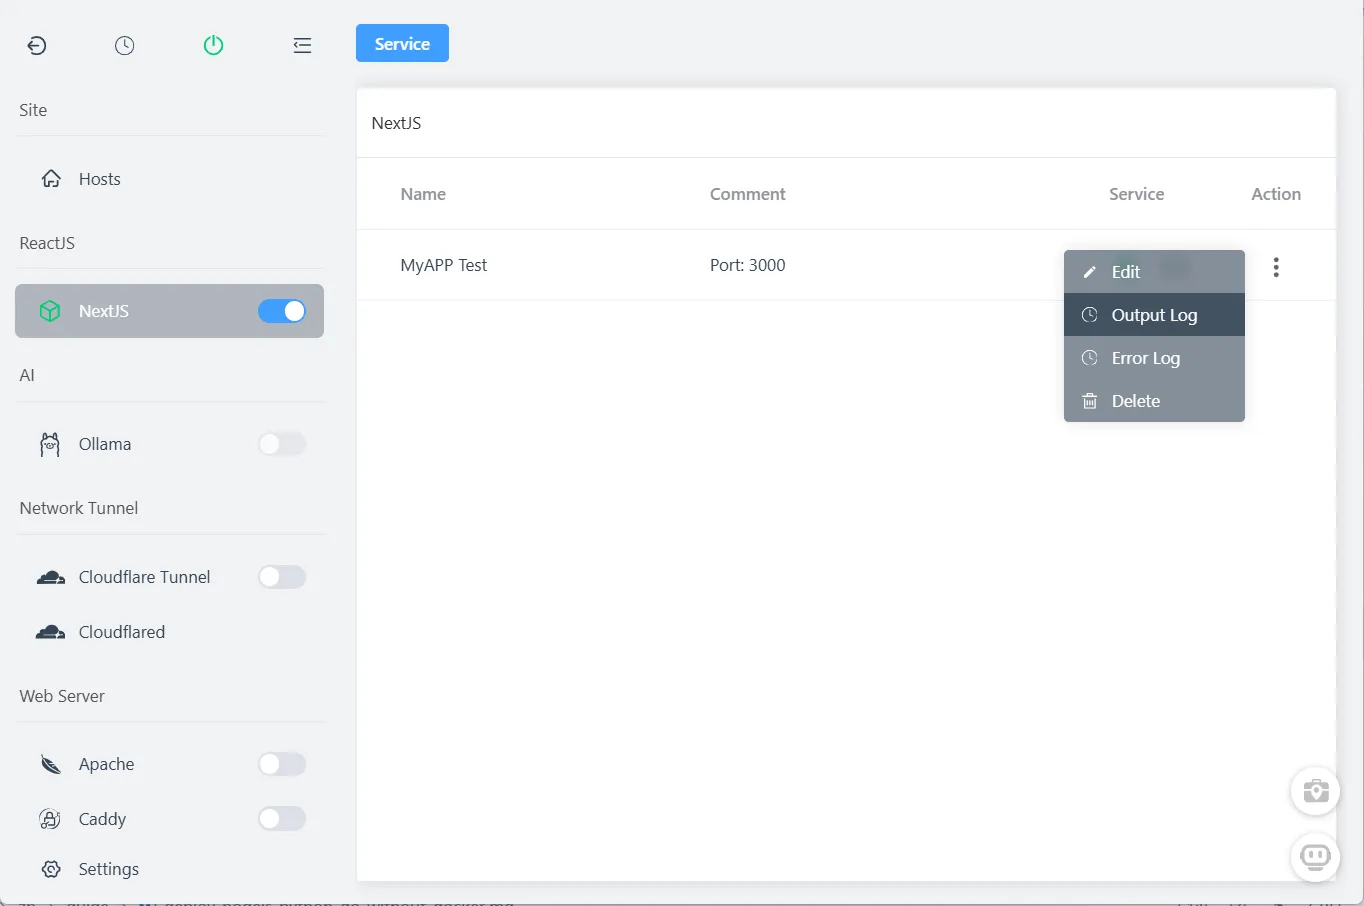
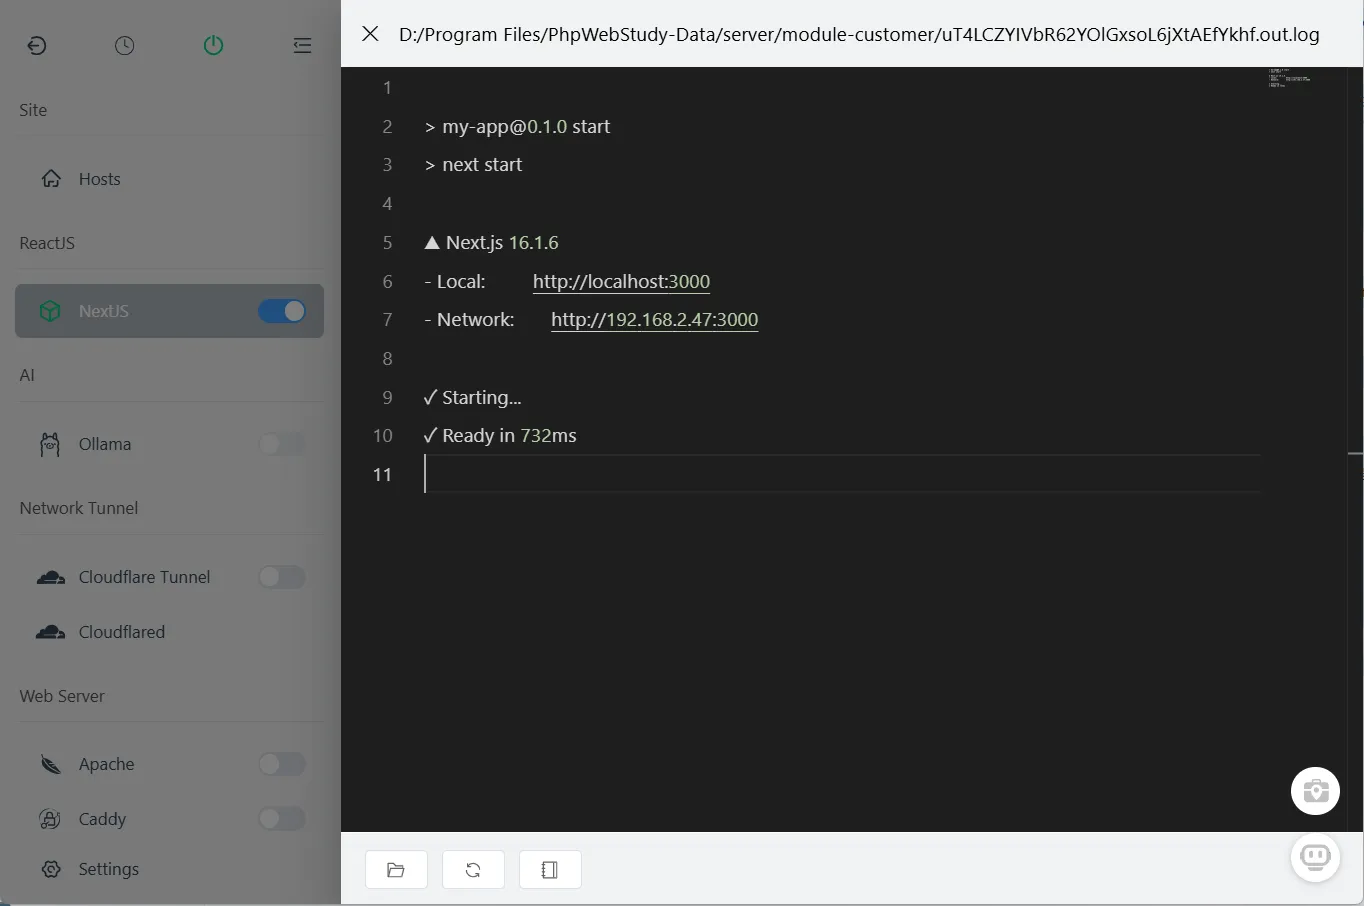
Step 8: Monitor Logs
Click the action buttons to view output and error logs in real-time:
Advanced: Custom Domains & HTTPS
Want to access your local app via https://myapp.test instead of localhost:3000?
- Go to the Sites module in FlyEnv
- Create a new site with your desired local domain
- Set up reverse proxy to your app's port (3000)
- FlyEnv automatically generates and manages SSL certificates
→ Learn more about Custom Domains & Auto SSL
Advanced: Share Your Local App (Tunneling)
Need to share your localhost with a colleague or client? FlyEnv integrates with Cloudflare Tunnel:
→ Expose Localhost with Cloudflare Tunnel
Best Practices
- Always note the port: Add port numbers in the Notes field to avoid conflicts
- Use absolute paths: In commands, use full paths to avoid working directory issues
- Environment variables: Set env vars in your shell profile or use FlyEnv's environment management
- Project isolation: Create separate module categories for different tech stacks
Video Walkthrough
Prefer watching? See Ditch Docker for Local Dev, Run Node, Python & Go as Native Services use FlyEnv in action:
Frequently Asked Questions (FAQ)
Q: Does this use less RAM than Docker?
Yes, significantly. Docker Desktop typically consumes 2-4 GB of RAM just for the VM. FlyEnv runs native binaries with minimal overhead, often using 80% less memory.
Q: Can I run multiple projects with different Node.js versions?
Absolutely. FlyEnv's project-level isolation automatically switches Node.js versions when you work in different directories. No manual version managers needed.
Q: What if two projects need the same port?
Enable the "Single Instance" option in the project configuration. This ensures only one version runs at a time, preventing port conflicts.
Q: Is this suitable for production deployment?
FlyEnv is designed for local development and testing. For production, use proper deployment pipelines with Docker, Kubernetes, or your cloud provider's native solutions.
Q: Can I deploy PHP, Java, or other languages too?
Yes! The custom module system works with any language that can be started via command line. FlyEnv has dedicated modules for PHP, Java, Python, Go, and more.
Q: How do I debug if my app won't start?
Check the error logs in the FlyEnv interface (Step 8). Common issues include:
- Port already in use (check the Notes field for conflicts)
- Missing dependencies (run
npm installor equivalent) - Incorrect paths in the command (use absolute paths)
Ready to Ditch Docker for Local Dev?
FlyEnv gives you the best of both worlds: the isolation and convenience of containerized workflows, with the speed and simplicity of native development. No more waiting for containers to build, no more fighting with Docker Desktop updates.
Download FlyEnv and experience 10x faster local development today.
Related Guides: