Build Self-Hosted AI Workflows with n8n & Ollama (No Docker Required)
Tired of paying monthly fees for AI automation tools like Zapier or Coze? Concerned about sending sensitive data to third-party cloud services? Many developers want to build AI-powered workflows but get stuck with complex Docker setups, manual configuration nightmares, and constant worries about data privacy.
This guide shows you how to create a fully self-hosted, offline-capable AI workflow using n8n (the open-source alternative to Zapier) and Ollama (local LLM runner)—all managed effortlessly with FlyEnv. No Docker required, no cloud dependencies, and you can even expose your workflows securely to the internet when needed.
Why Self-Hosted AI Workflows Matter
| Cloud Automation Tools | Self-Hosted with FlyEnv |
|---|---|
| Monthly subscription fees | One-time setup, free forever |
| Data sent to third-party servers | 100% private, runs locally |
| Limited customization | Full control over workflows |
| Requires internet connection | Works offline completely |
| Complex API rate limits | Unlimited local API calls |
FlyEnv's native approach means n8n and Ollama run as native binaries—not bloated containers—using up to 80% less RAM than Docker-based solutions.
Prerequisites
Before starting, ensure you have:
- FlyEnv installed on macOS, Windows, or Linux (Download here)
- Basic familiarity with workflow automation concepts
- At least 8GB RAM (16GB recommended for larger AI models)
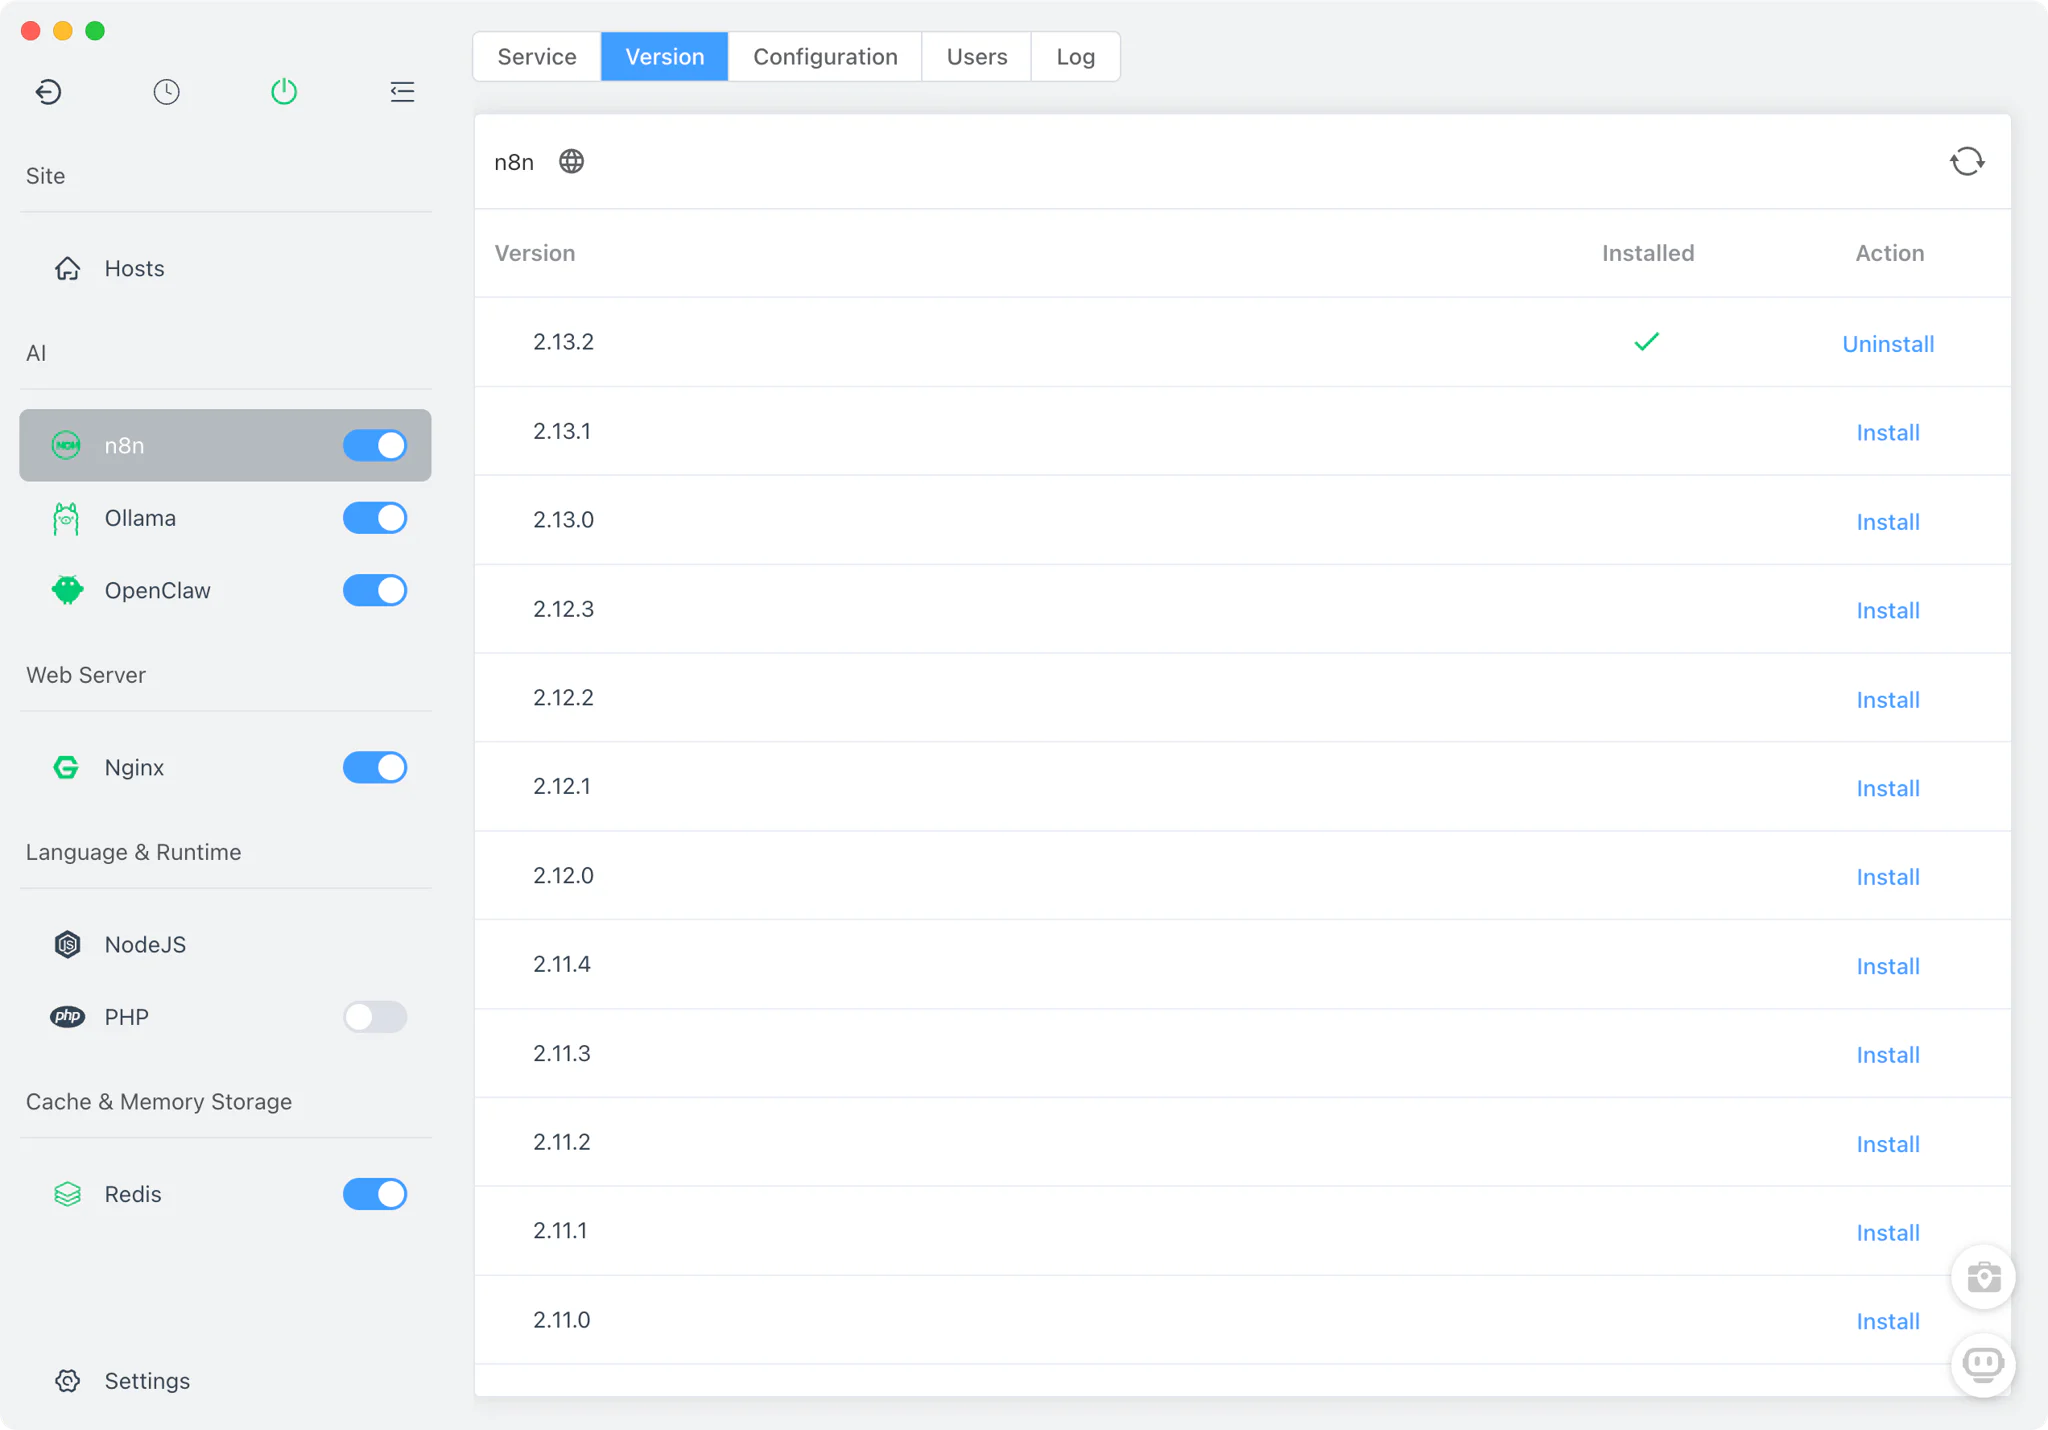
Step 1: Install and Start n8n
FlyEnv includes n8n as a built-in module, eliminating the need for manual Node.js setup or Docker containers.
- Open FlyEnv and navigate to the Tools section
- Find n8n in the available modules list
- Click Install—FlyEnv automatically handles all dependencies
- Once installed, click Start to launch the n8n service
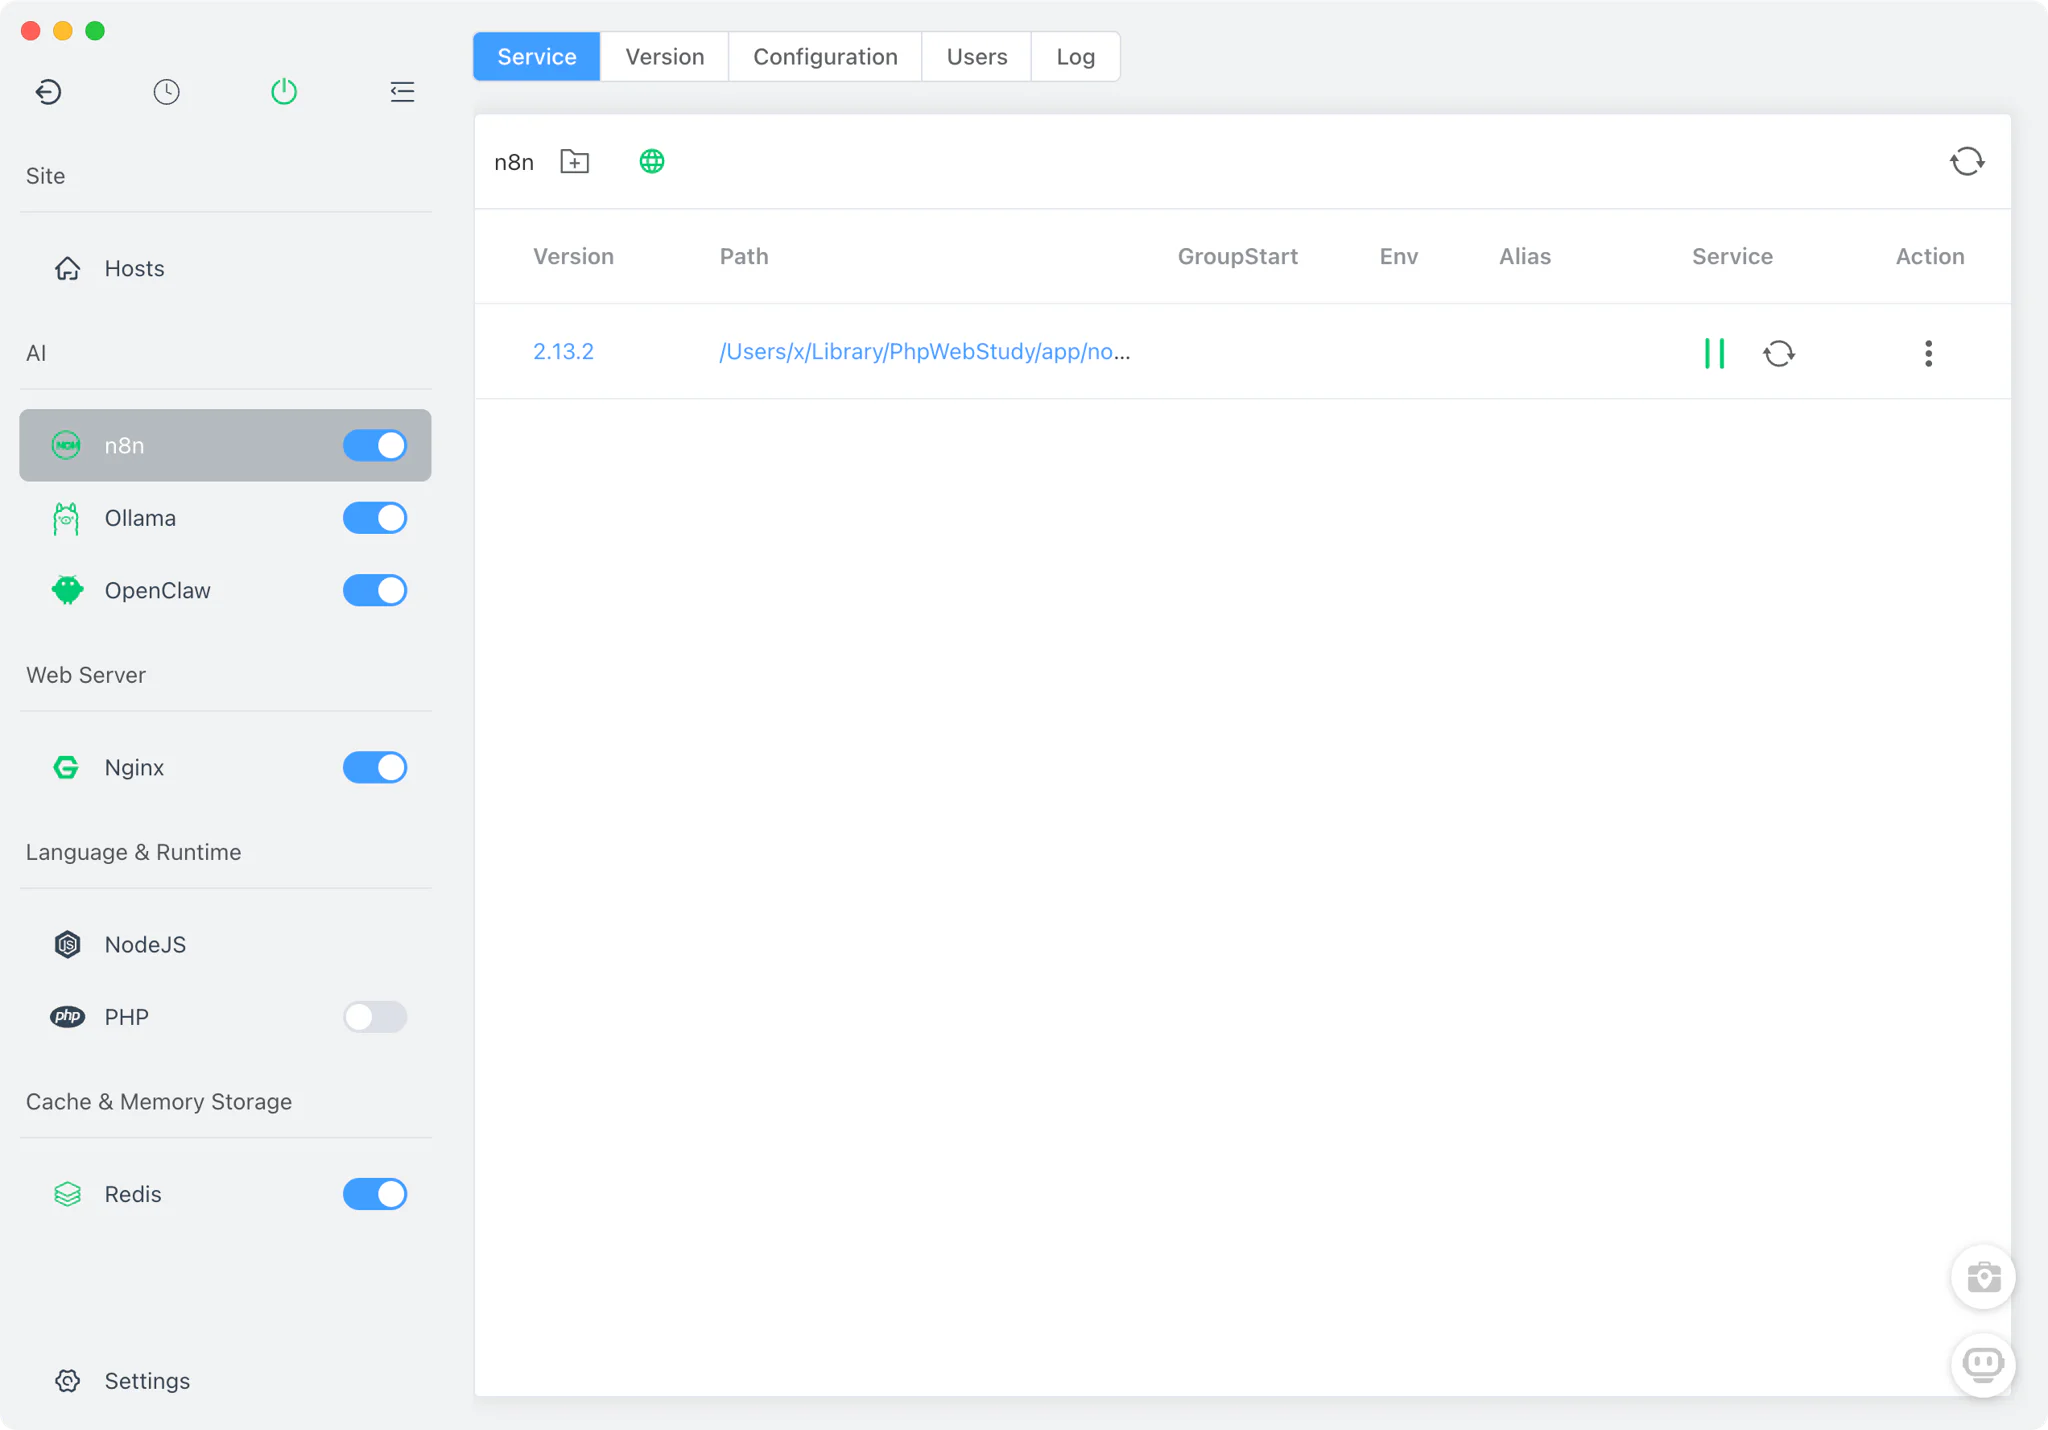
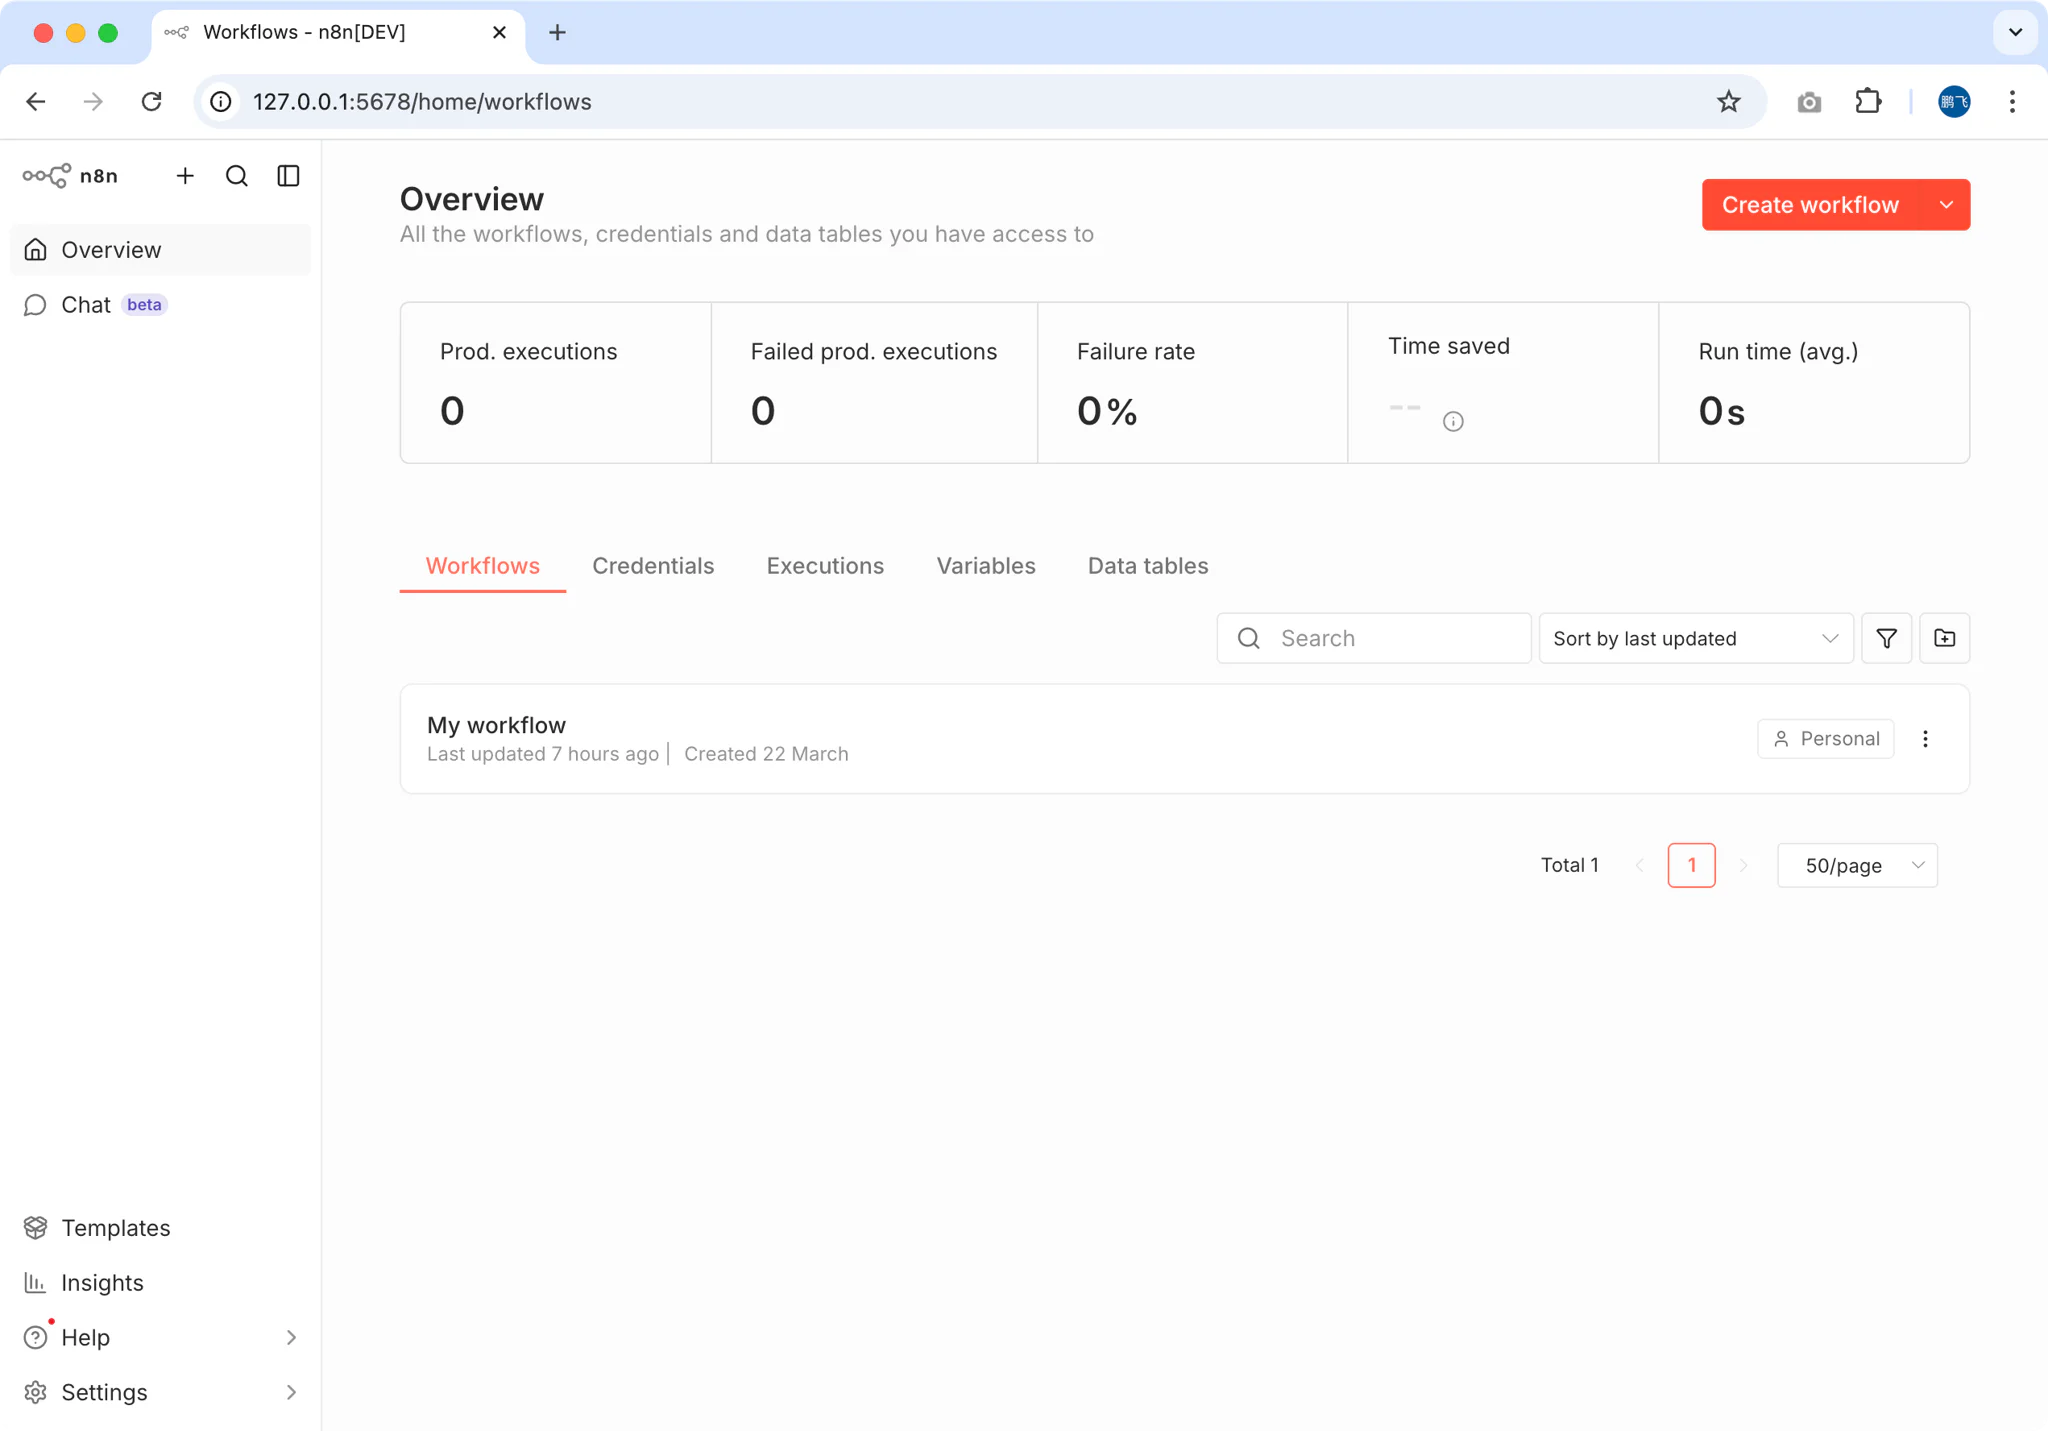
- Access the n8n web interface at
http://localhost:5678
Tip: FlyEnv manages the Node.js runtime automatically. You don't need to worry about version conflicts or global npm packages.
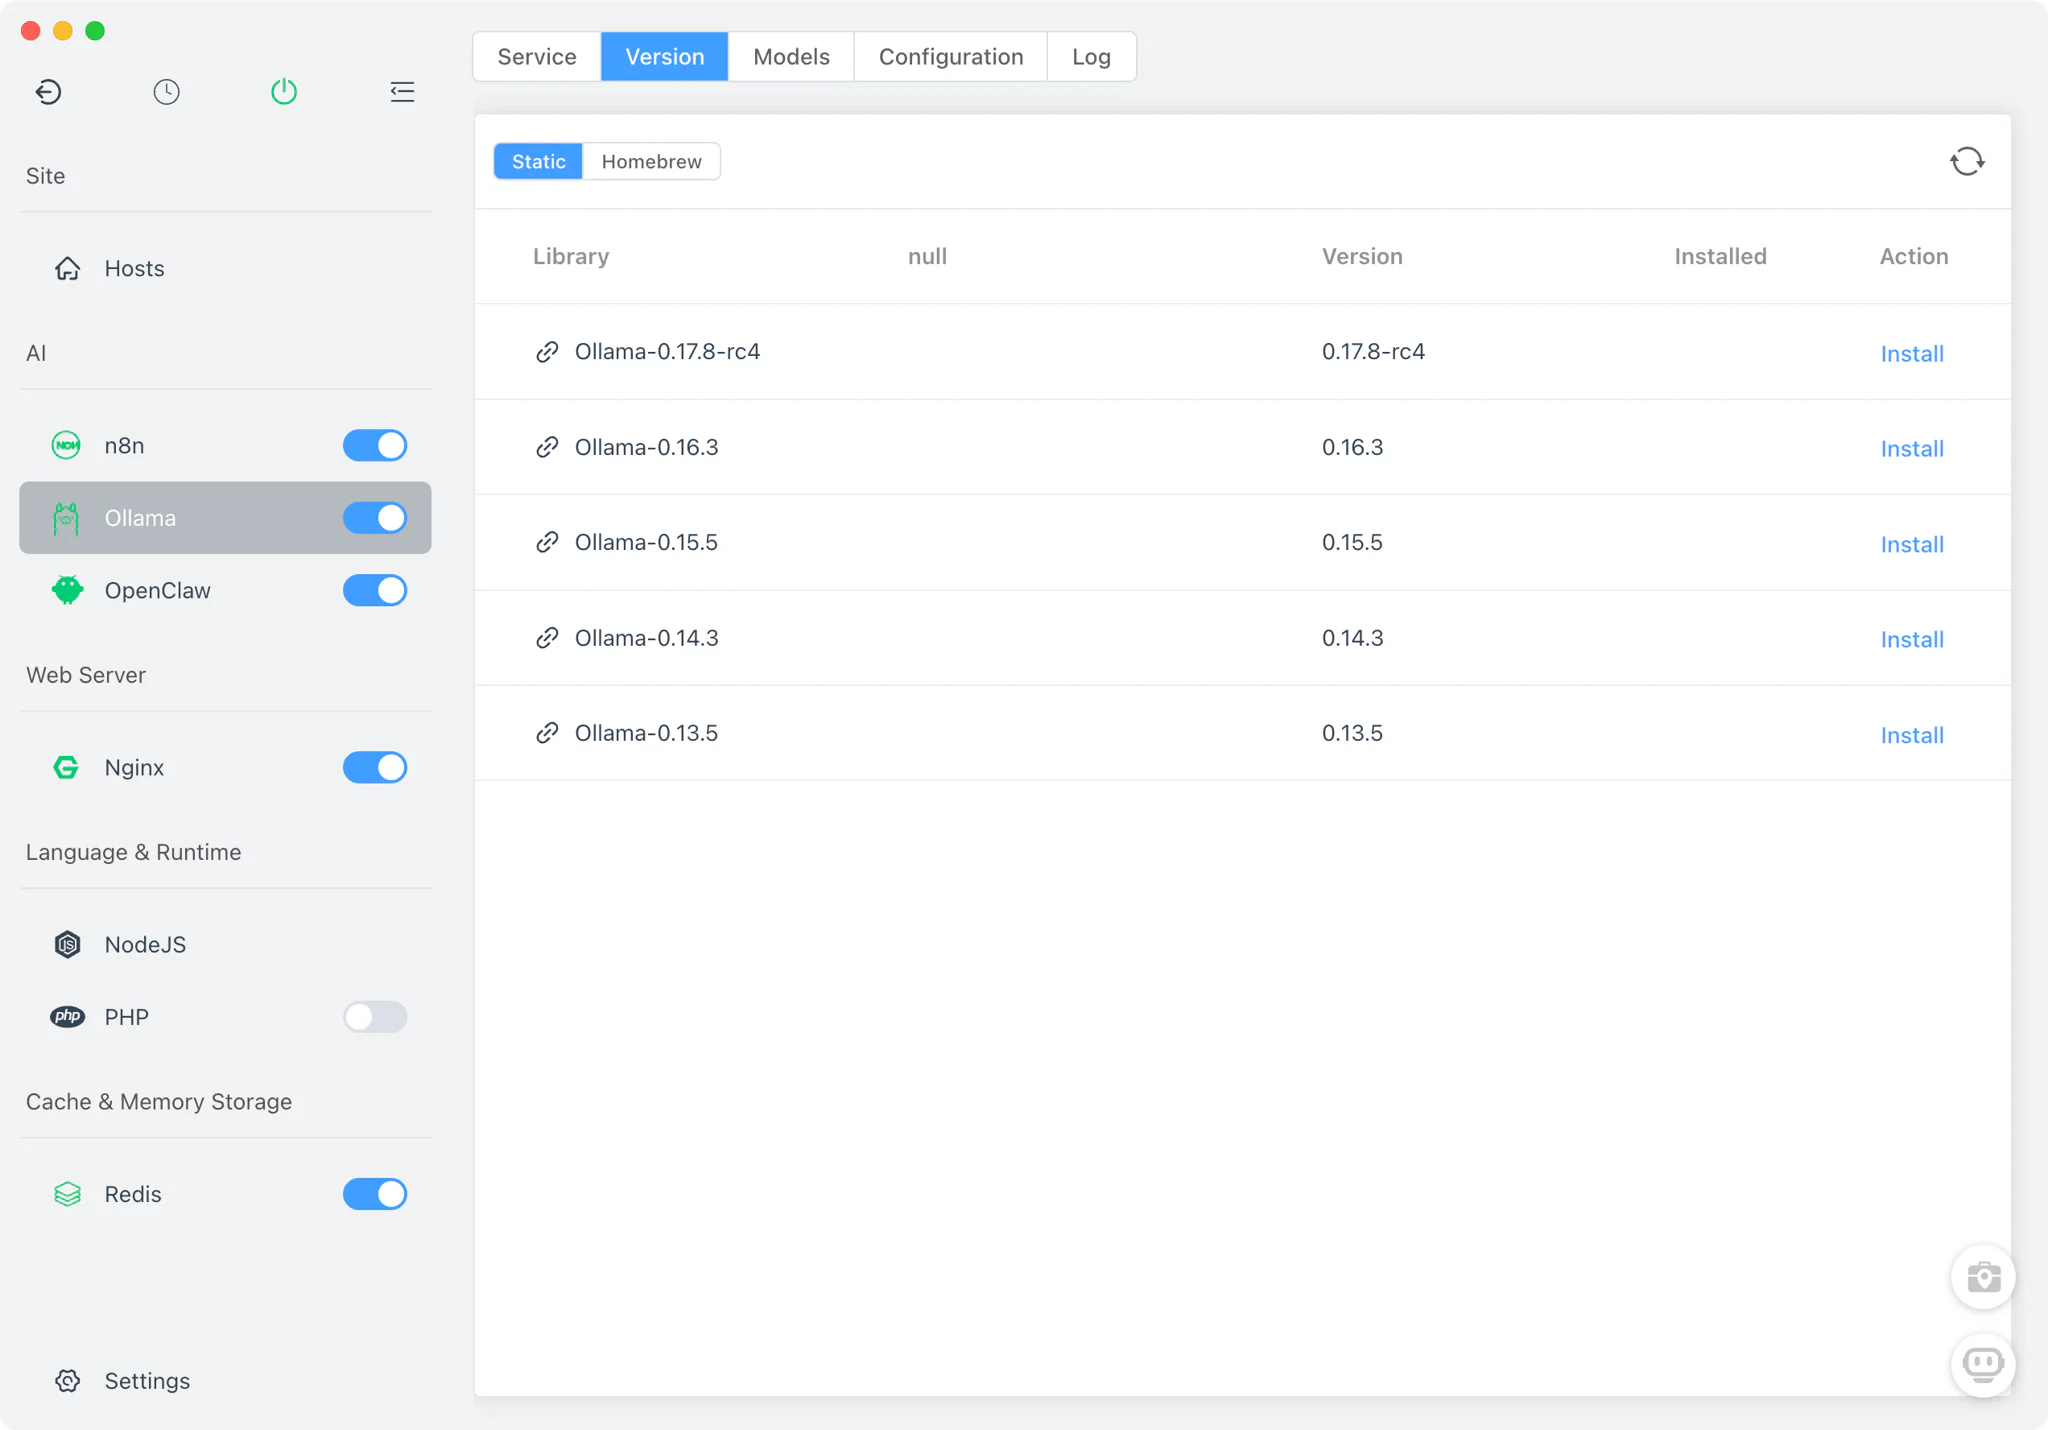
Step 2: Install Ollama and Download AI Models
Now let's set up the AI brain of your workflow using Ollama.
- In FlyEnv, go to the AI Tools section
- Select Ollama and click Install
- Start the Ollama service
- Download your preferred model. Choose based on your computer's specs. See [/guide/build-local-offline-ai-agent](Build Local Offline AI Agent) for details.
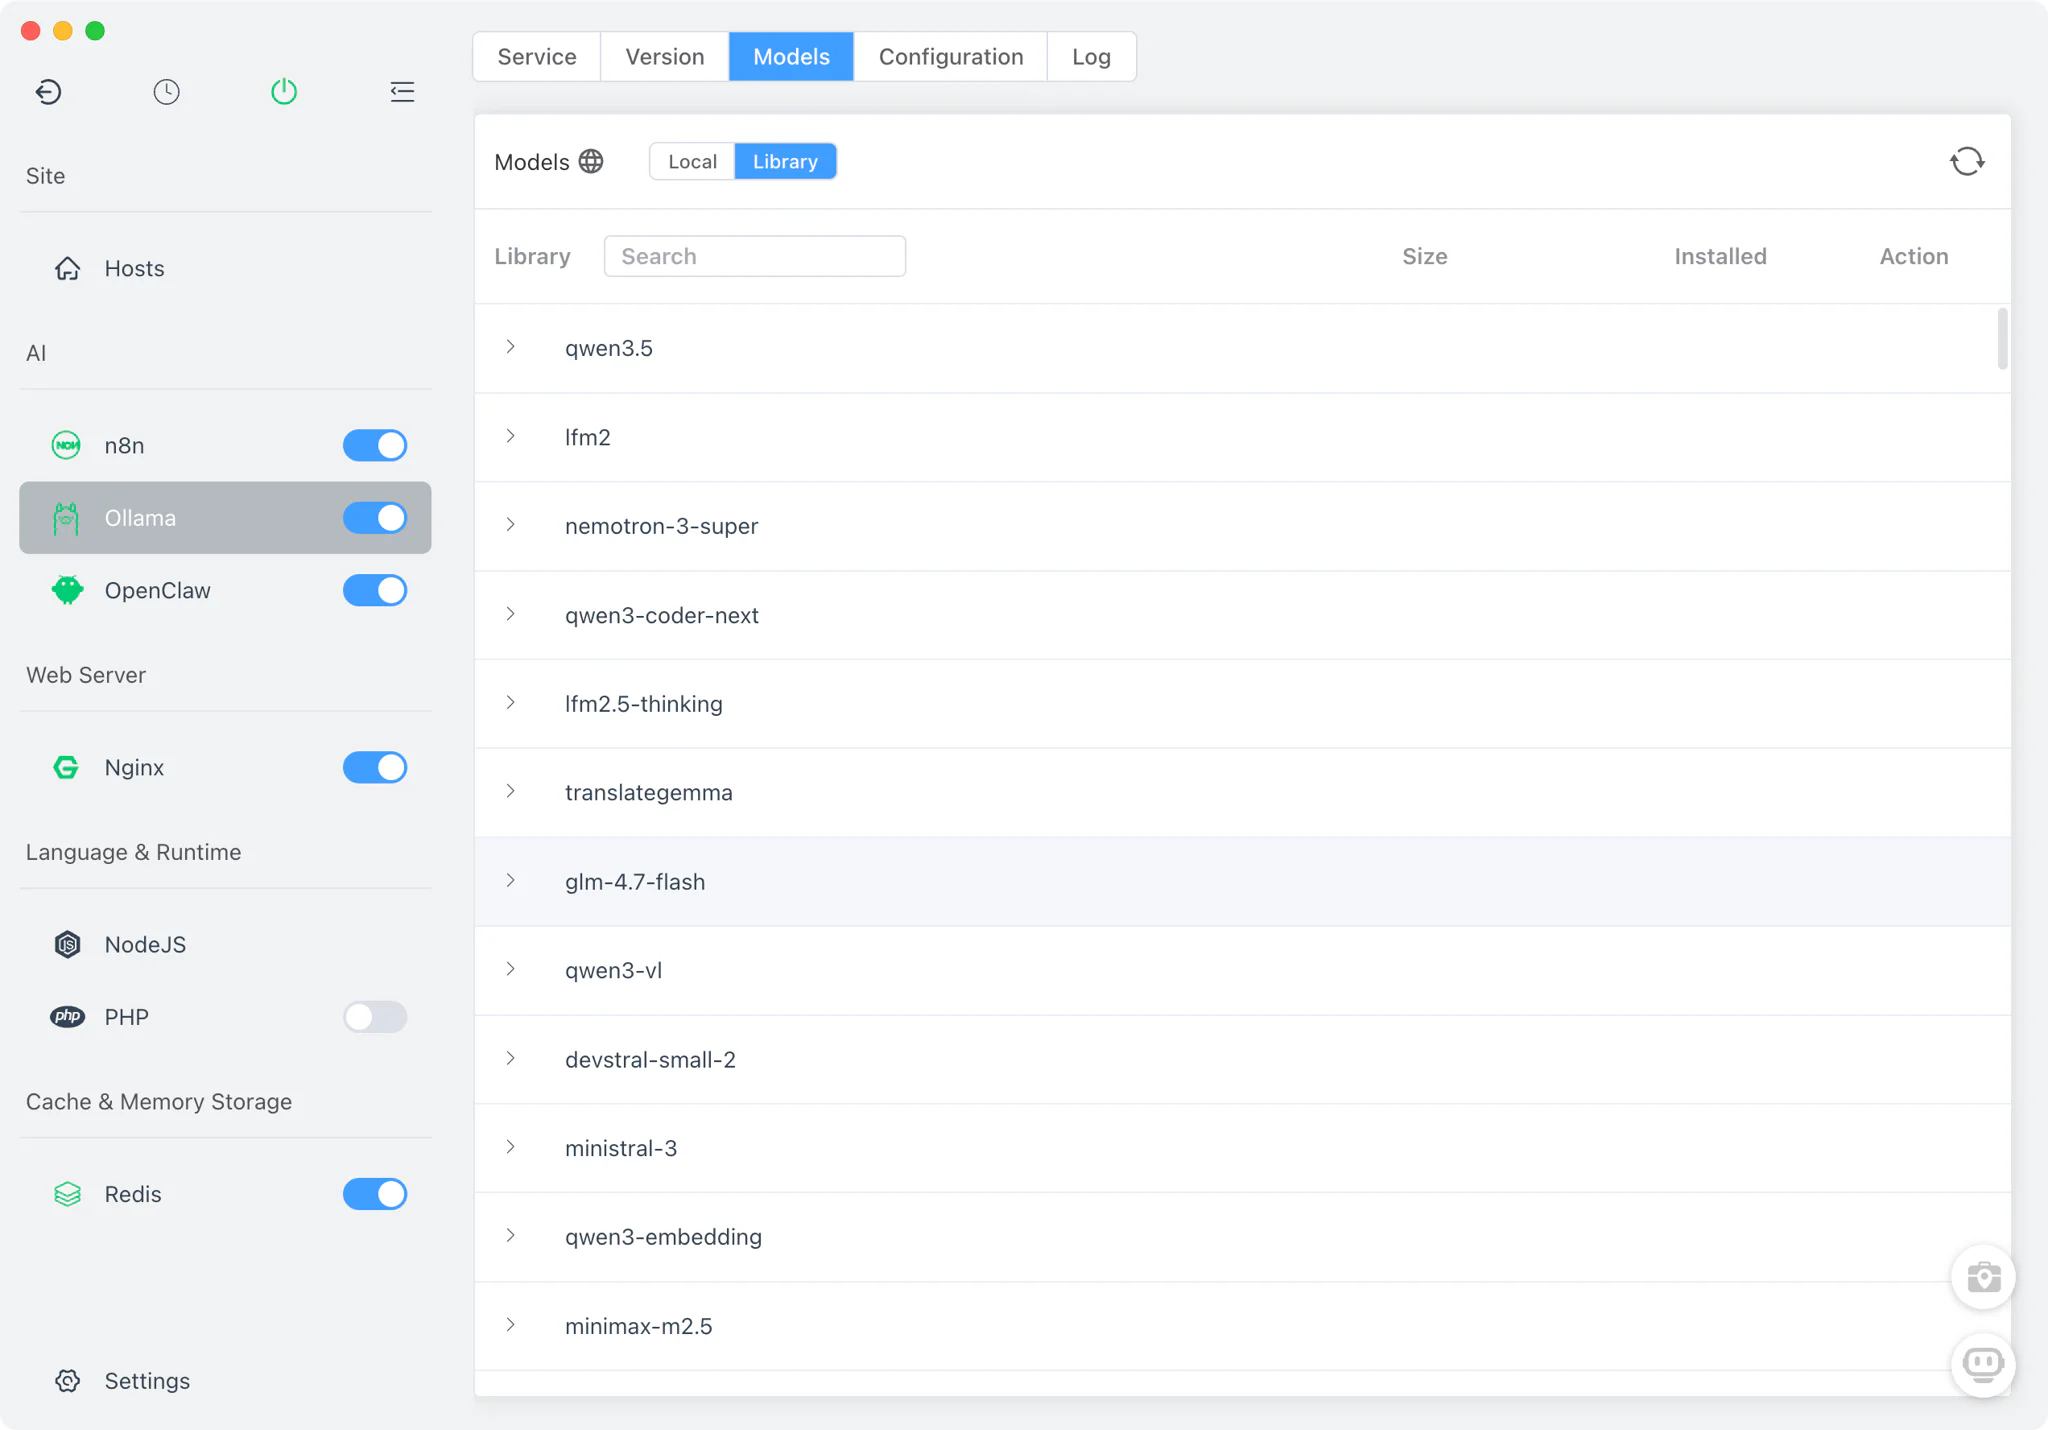
Available models include:
- Qwen 3.5 - Excellent for general tasks and coding
- Kimi k2.5 - Great for general tasks and programming
- Gemma 3 - Google's efficient open models
- Llama 4 - Meta's latest with strong reasoning capabilities
- DeepSeek Coder - Specialized for programming tasks
Step 3: Configure Your First AI Workflow
Now let's build a workflow that receives HTTP requests, processes them through your local AI, and returns intelligent responses.
3.1 Create a Webhook Trigger
- In n8n, click "Add Workflow"
- Search for "Webhook" and add it as the trigger node
- Configure the webhook:
- Method: POST
- Path:
ai-assistant - Response: Select
When Last Node Finishes(this returns the AI model's output)
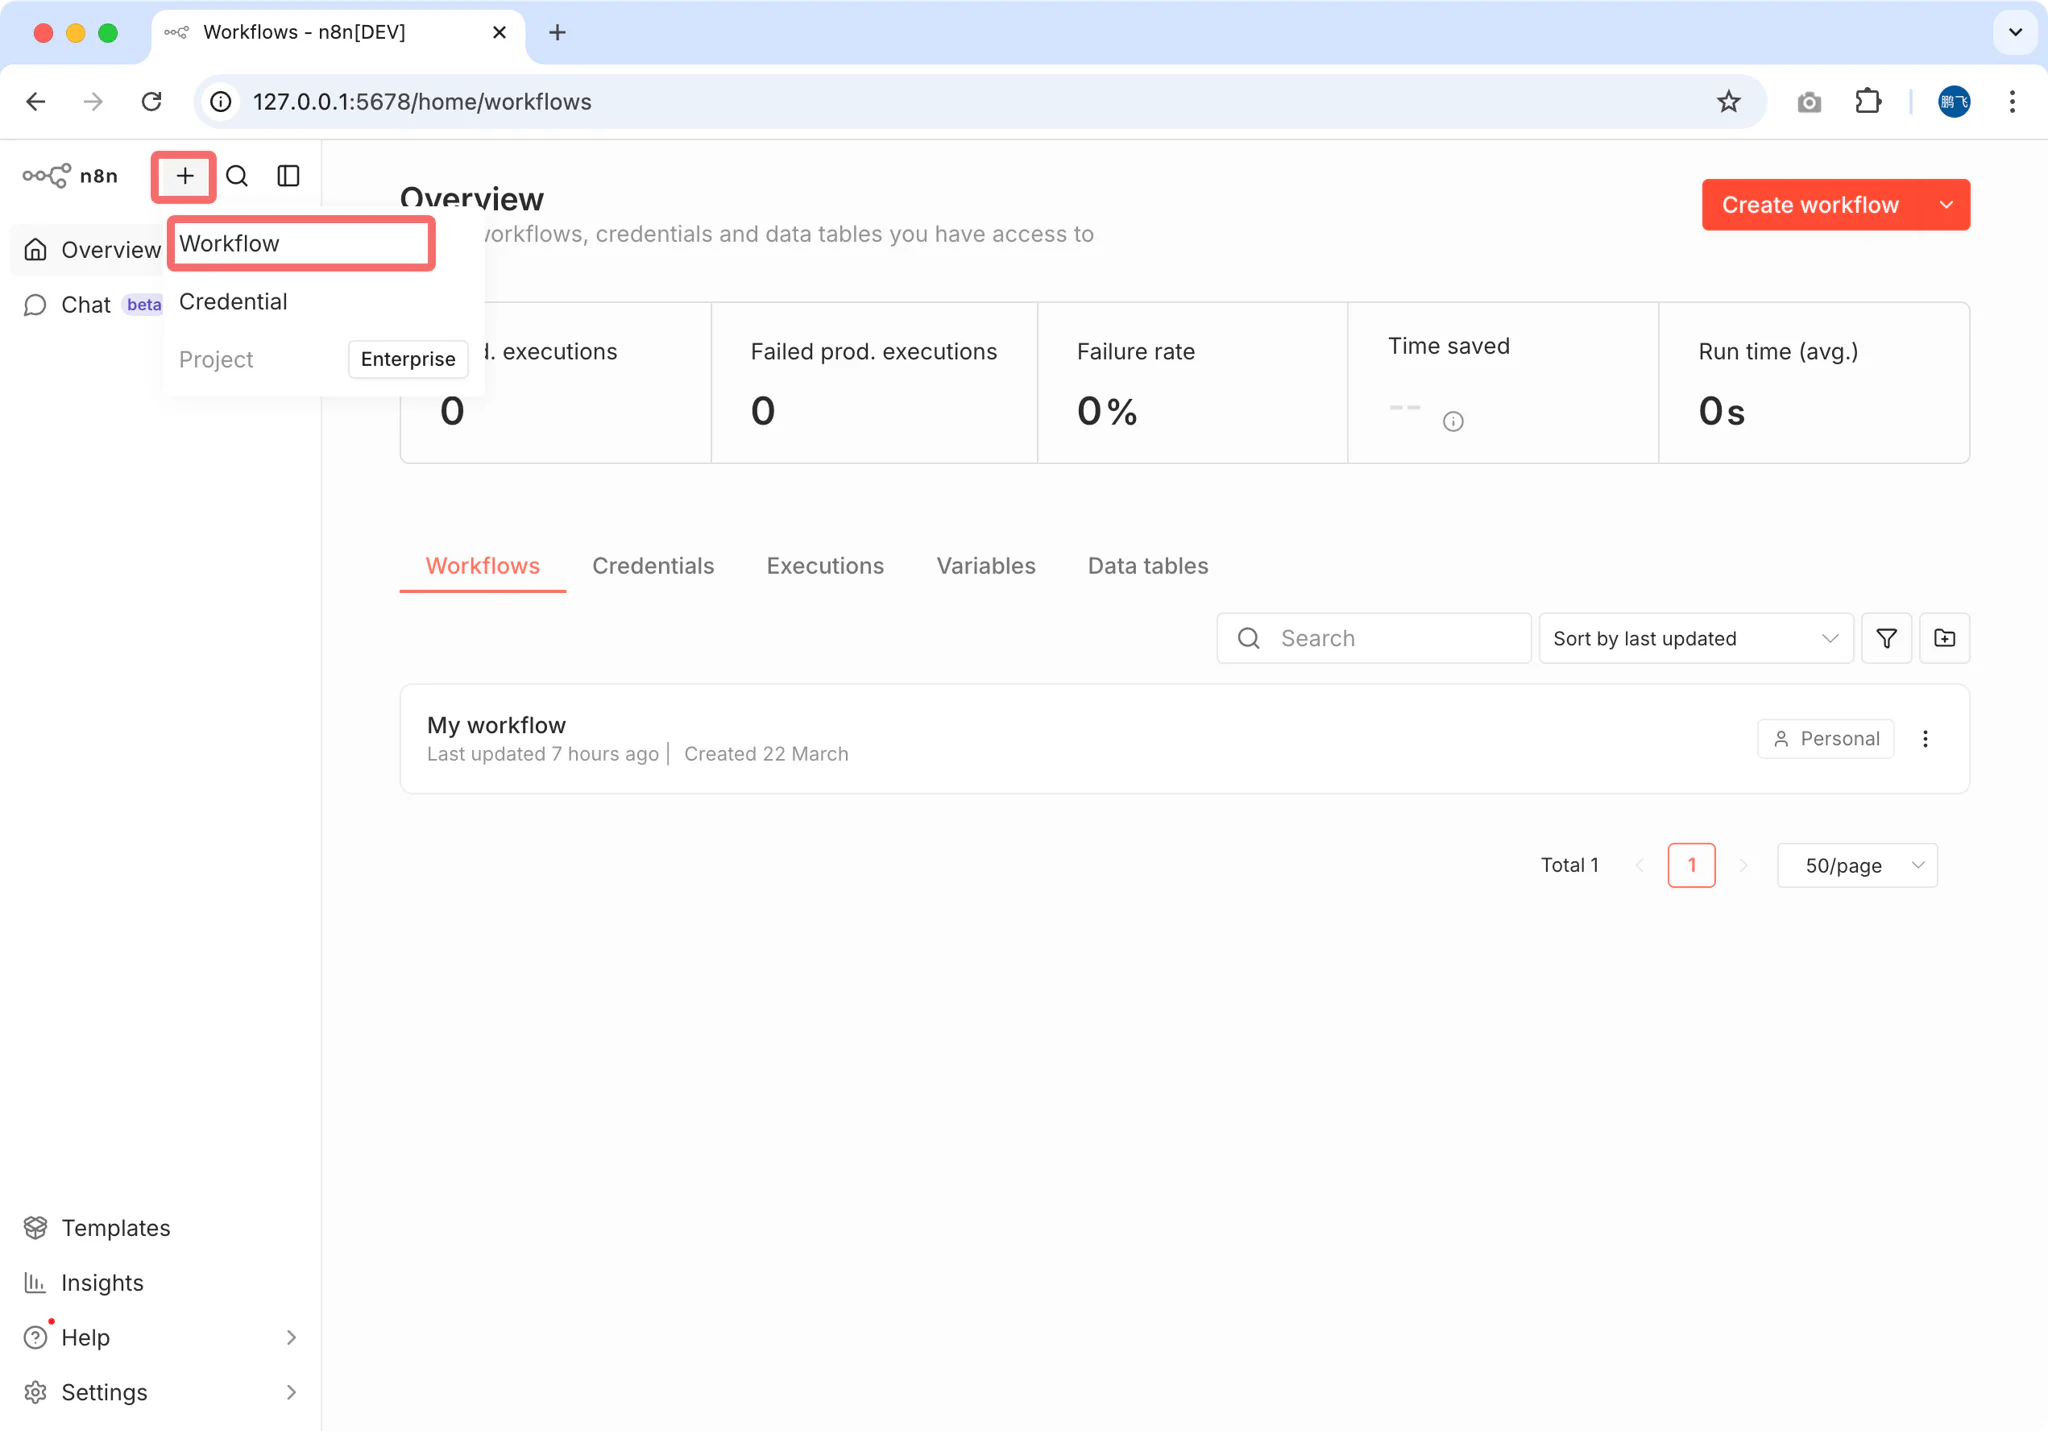
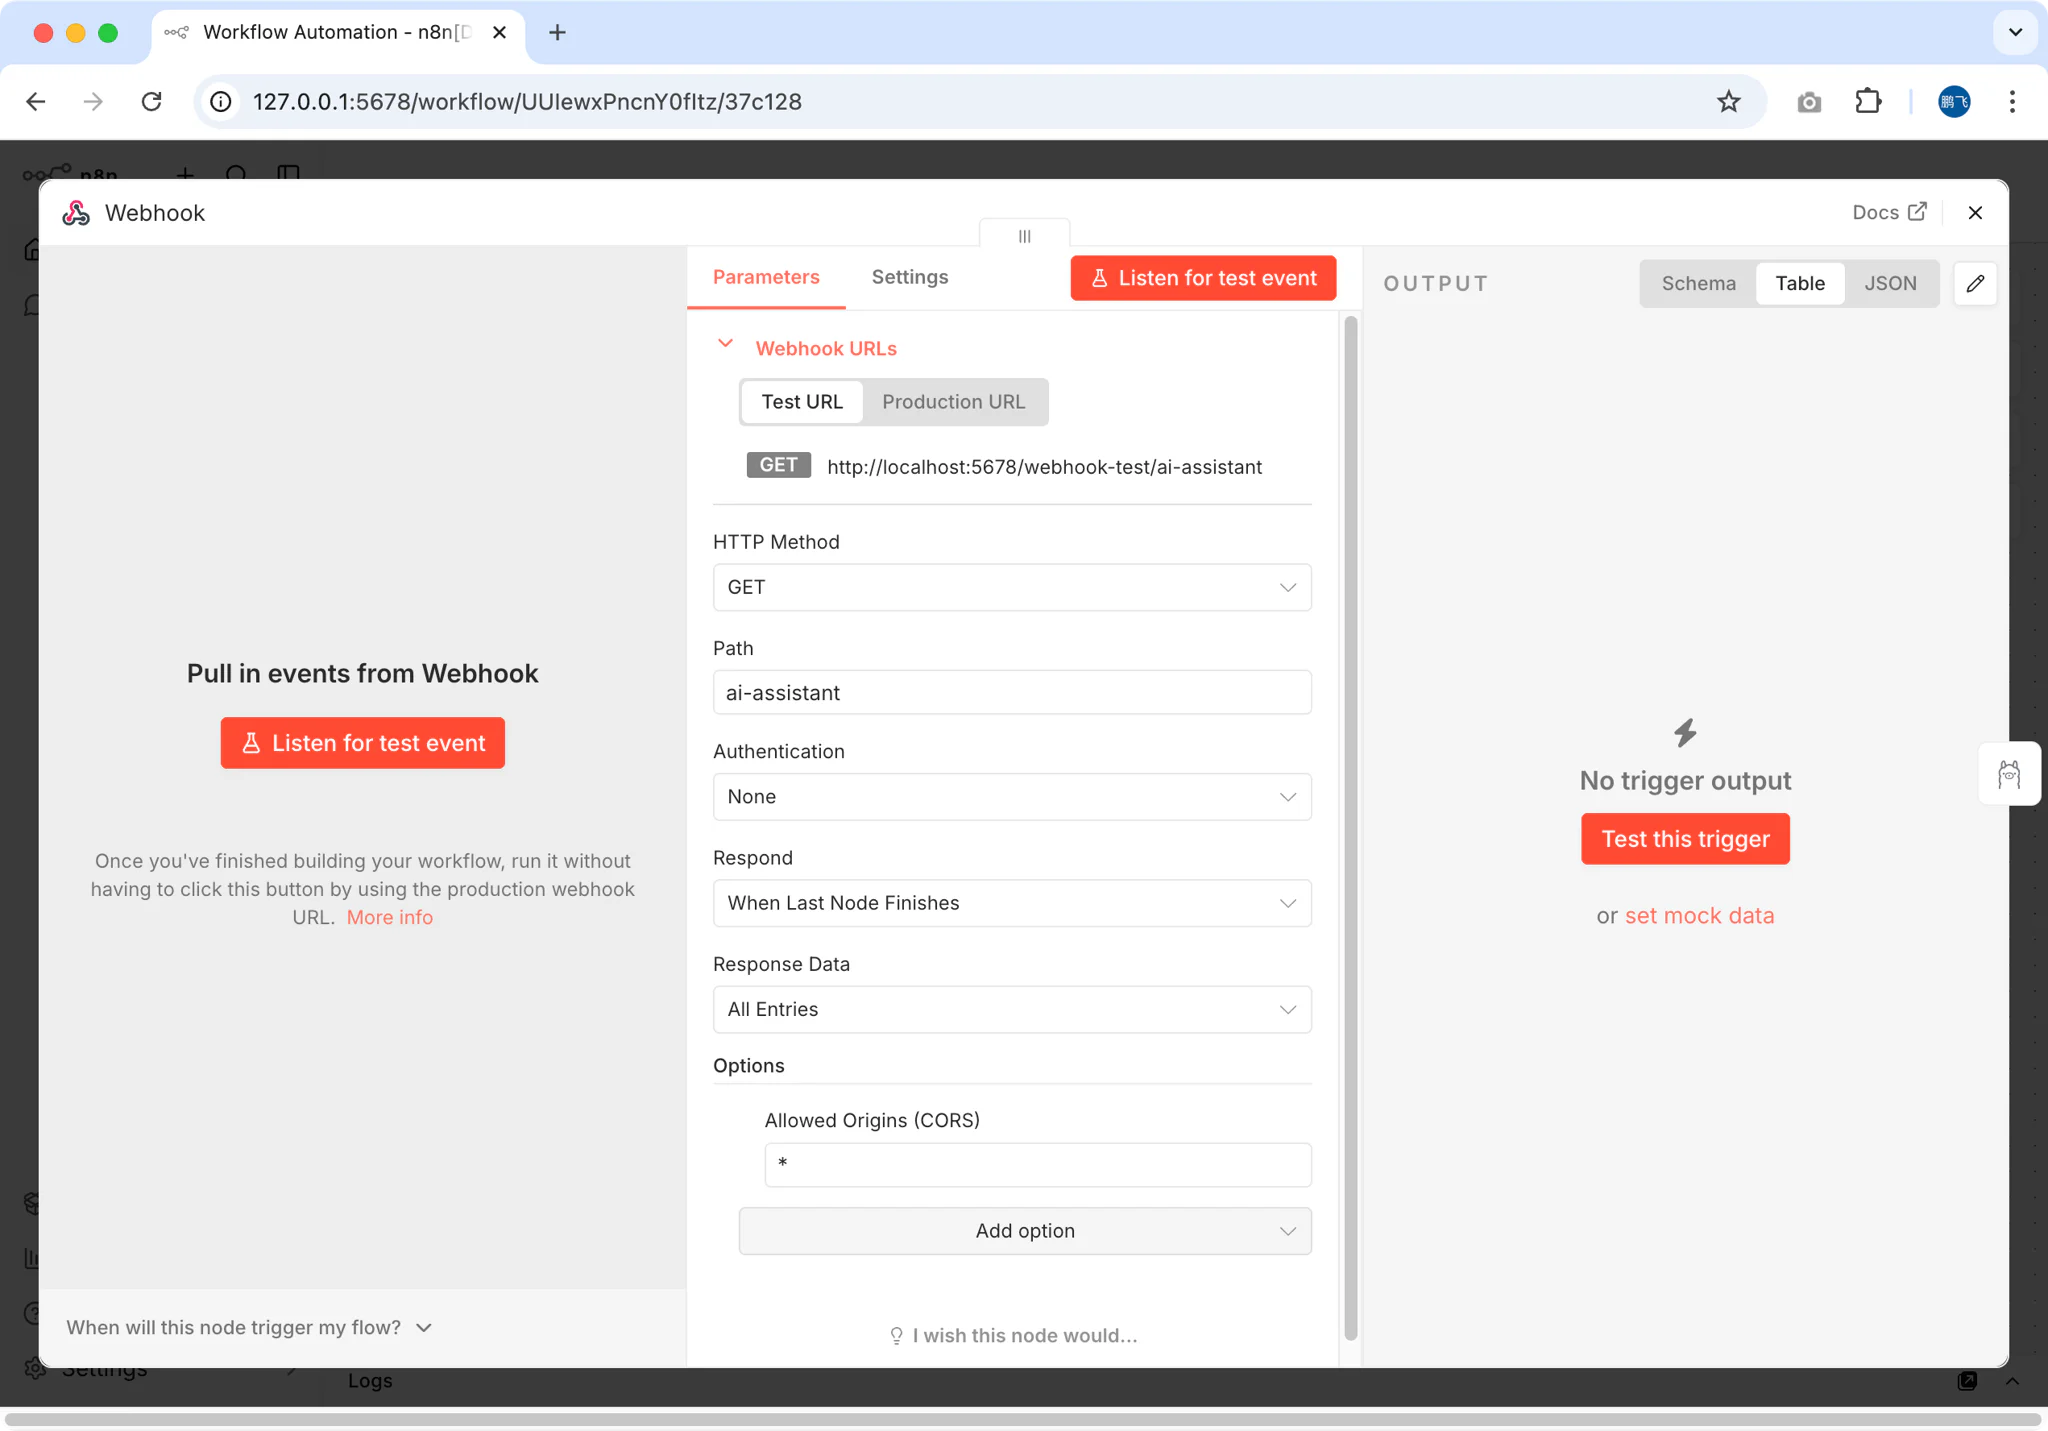
Important: Choosing "When Last Node Finishes" ensures the webhook returns the AI-generated response rather than an immediate acknowledgment.
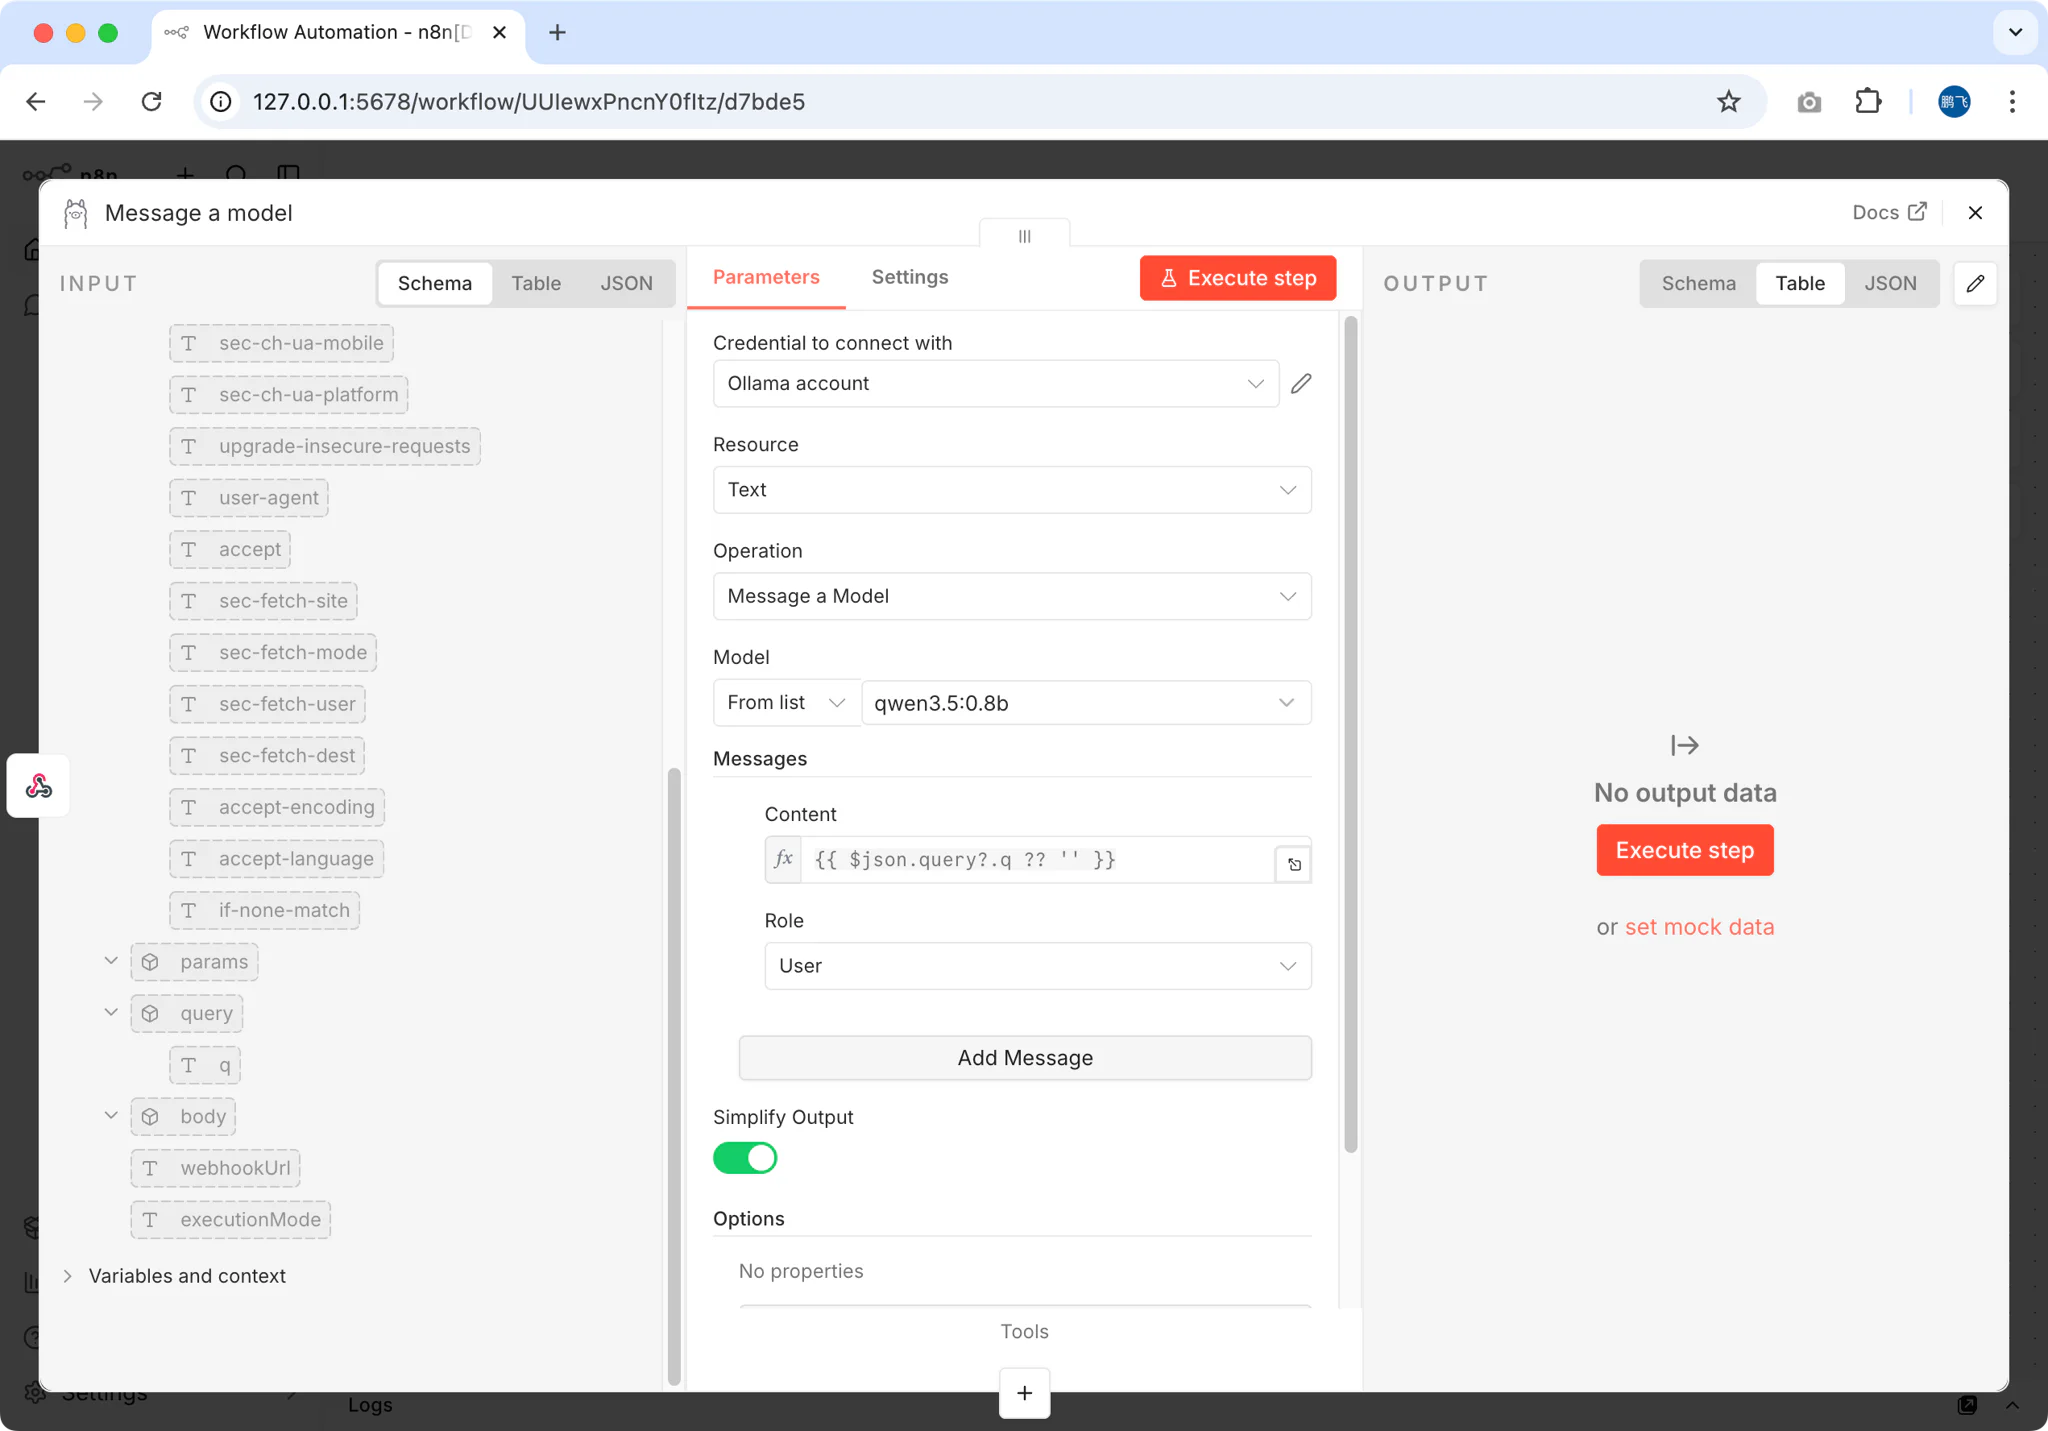
3.2 Add the Ollama AI Node
Add an Ollama node after the webhook
Configure the connection:
- Base URL:
http://localhost:11434(Ollama's default) - Model: Select the model you downloaded (e.g.,
qwen3.5)
- Base URL:
Set up the message template:
- In the Messages field, add a user message
- For the Content, use an expression to capture the webhook input:
\{\{ $json.query?.q ?? $json.body?.q ?? 'Hello' \}\}
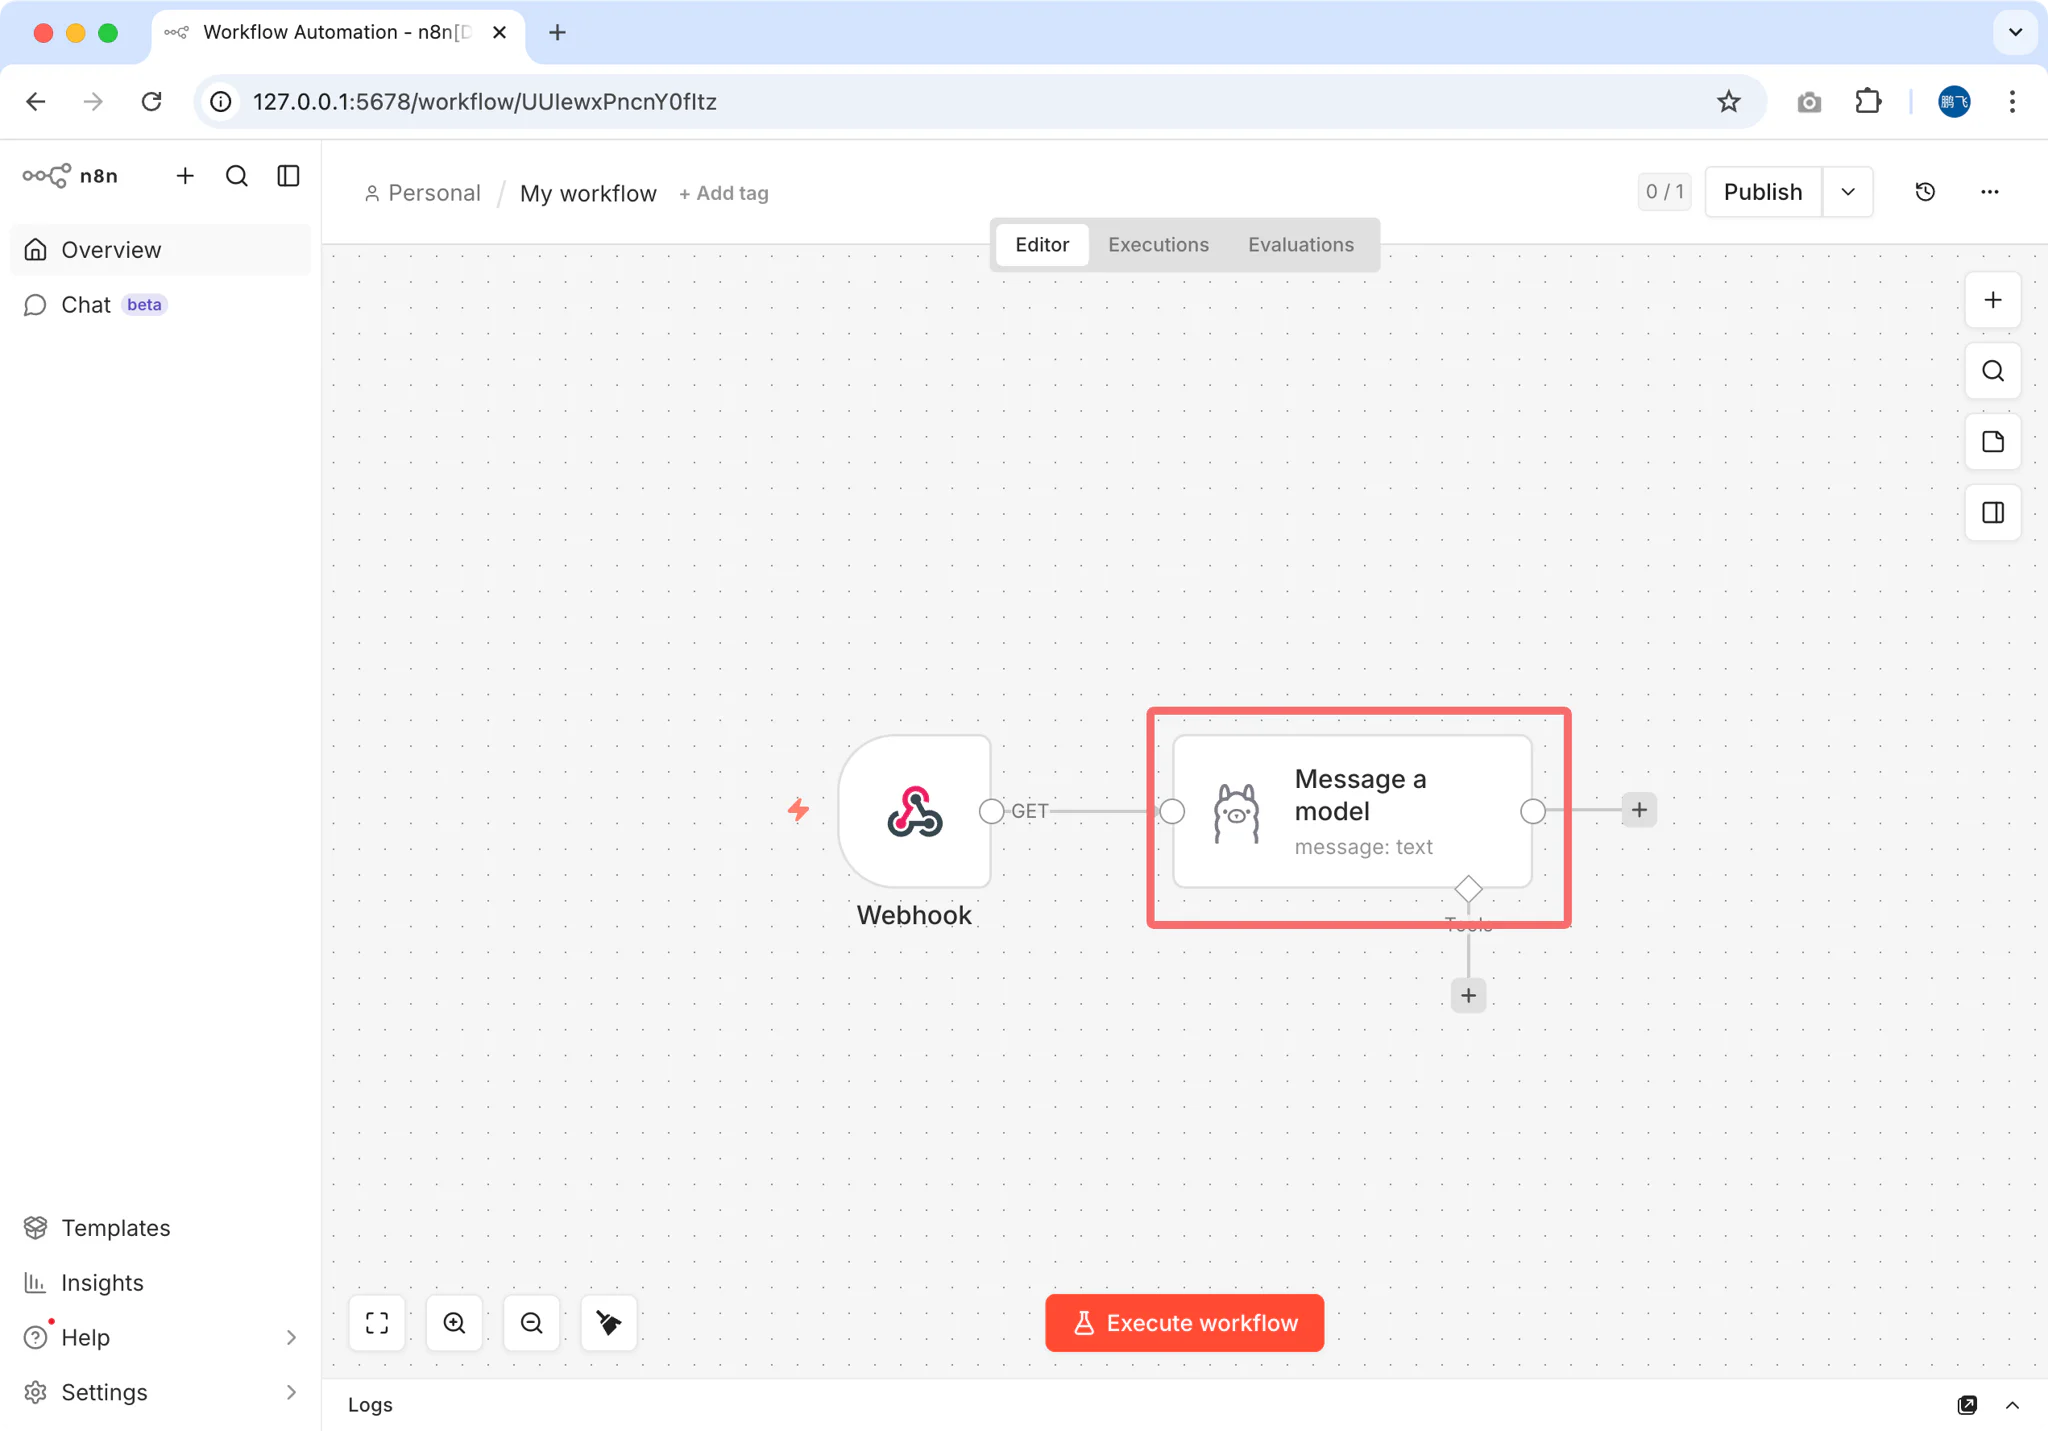
3.3 Test Your Workflow
Save the workflow and toggle it to Active
Copy the webhook URL (n8n provides both test and production URLs)
Test with curl or any HTTP client:
bashcurl -X POST "http://localhost:5678/webhook/ai-assistant" \ -H "Content-Type: application/json" \ -d '{"q": "Explain the benefits of local AI workflows"}'You should receive a response generated by your local AI model!
Step 4: Enable HTTPS with Reverse Proxy
For production use or external access, you need HTTPS. FlyEnv's built-in Site Manager makes this trivial.
4.1 Add a Local Domain
- Open FlyEnv's Site section
- Click "Add Site"
- Configure:
- Domain:
n8n.test(or any.testdomain) - Type: Reverse Proxy
- Target:
http://127.0.0.1:5678
- Domain:
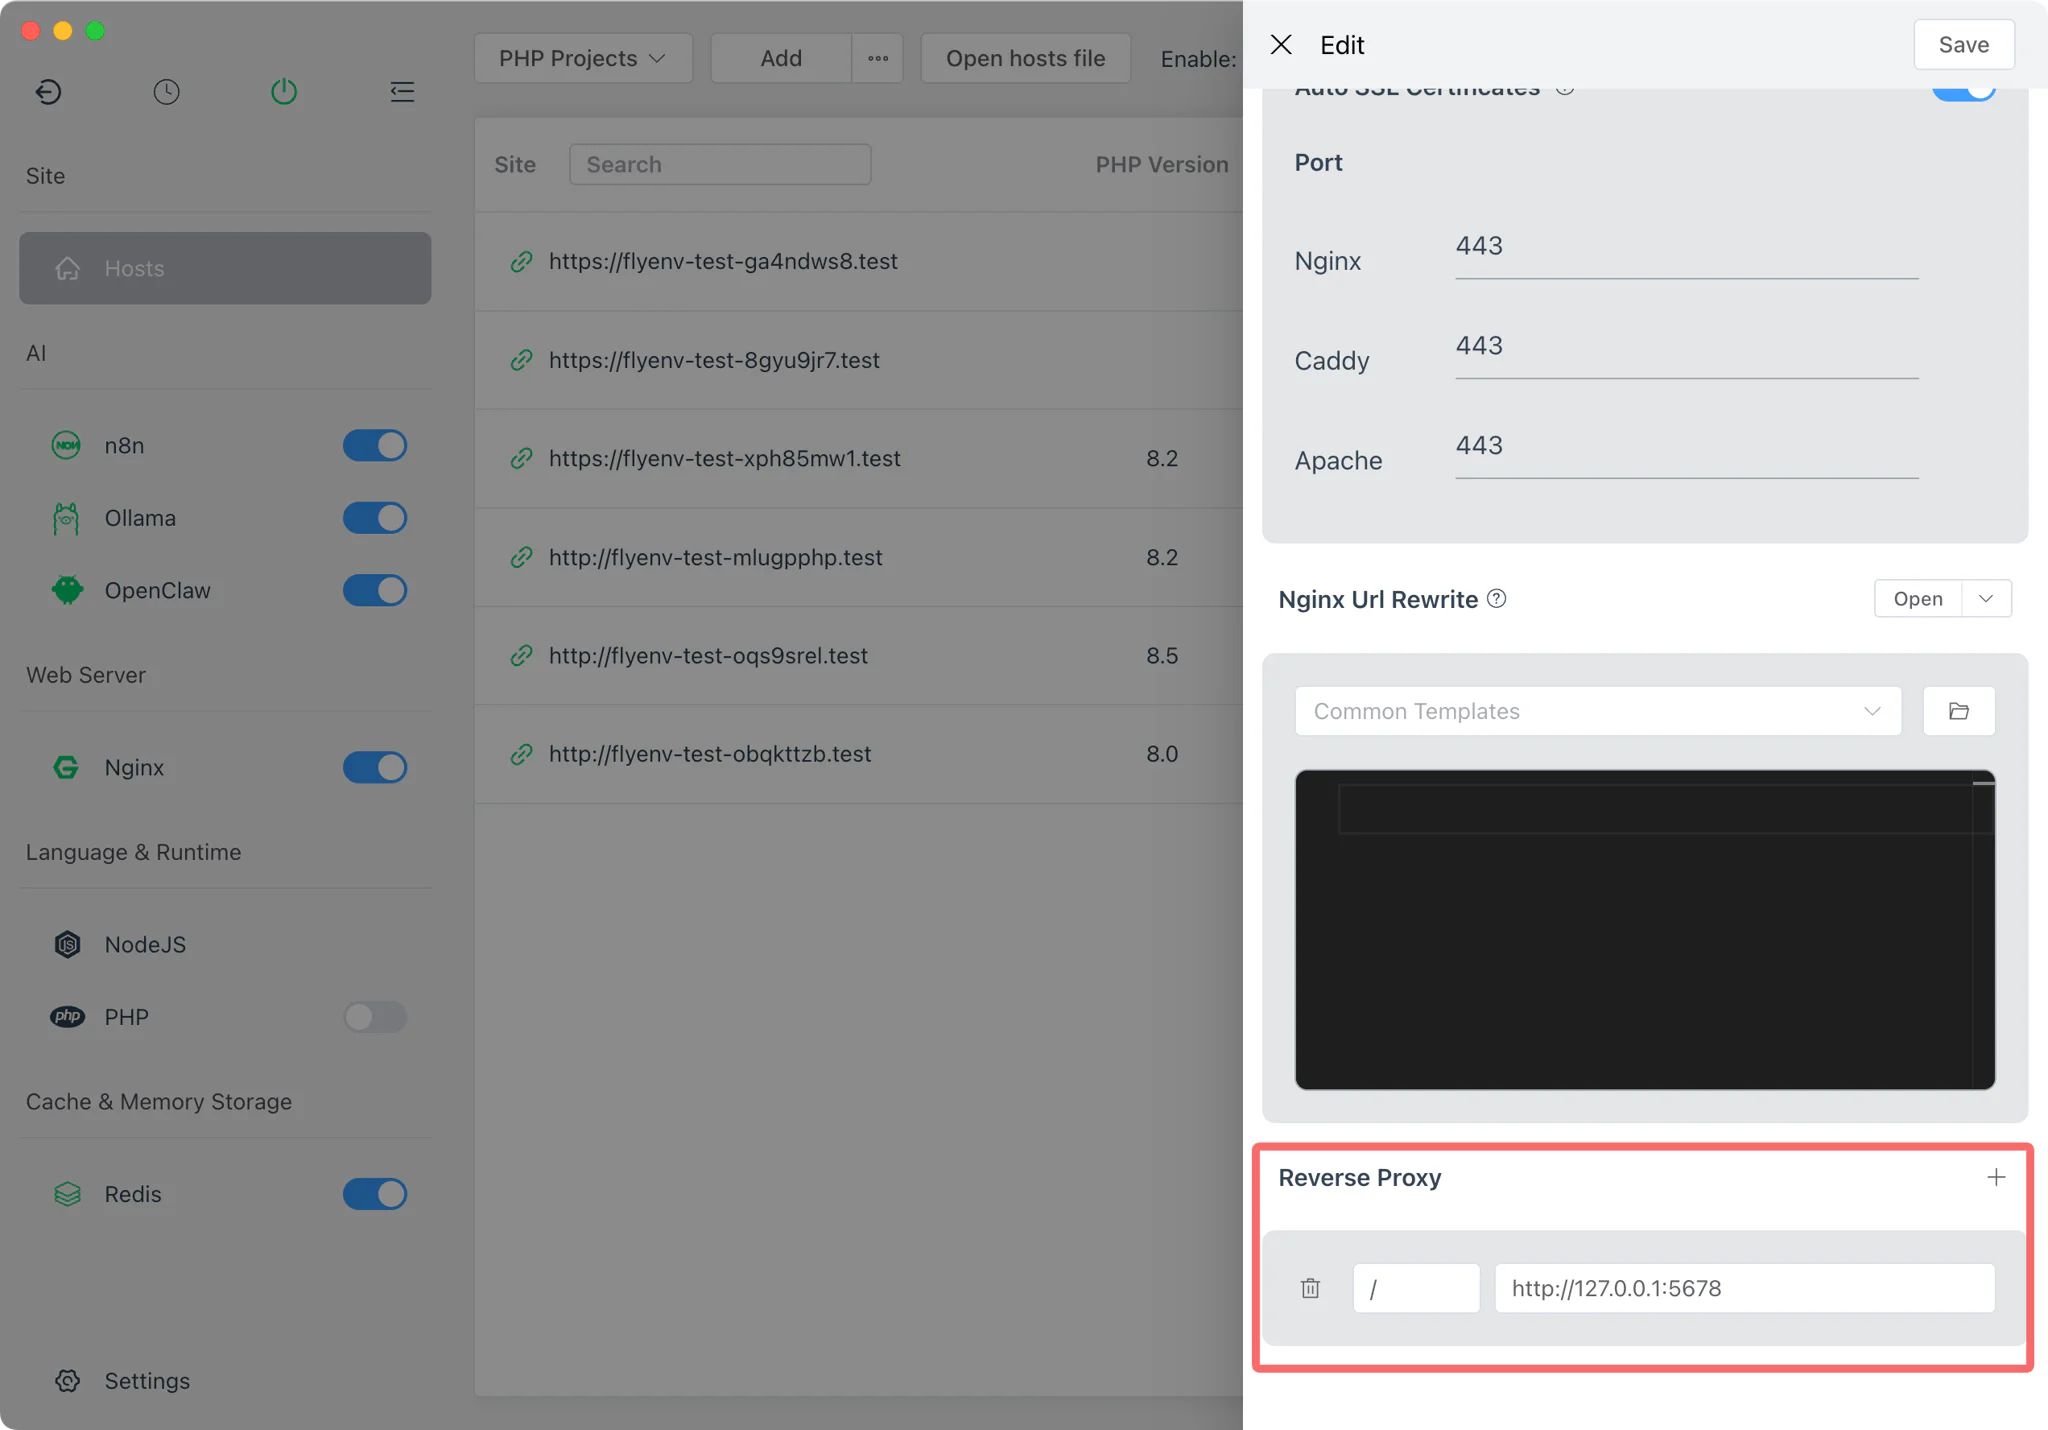
4.2 Enable Automatic SSL
FlyEnv automatically generates and manages local SSL certificates:
- In the site settings, enable "Auto SSL"
- FlyEnv configures Nginx/Caddy/Apache with the certificate
- Access your n8n instance at
https://n8n.test
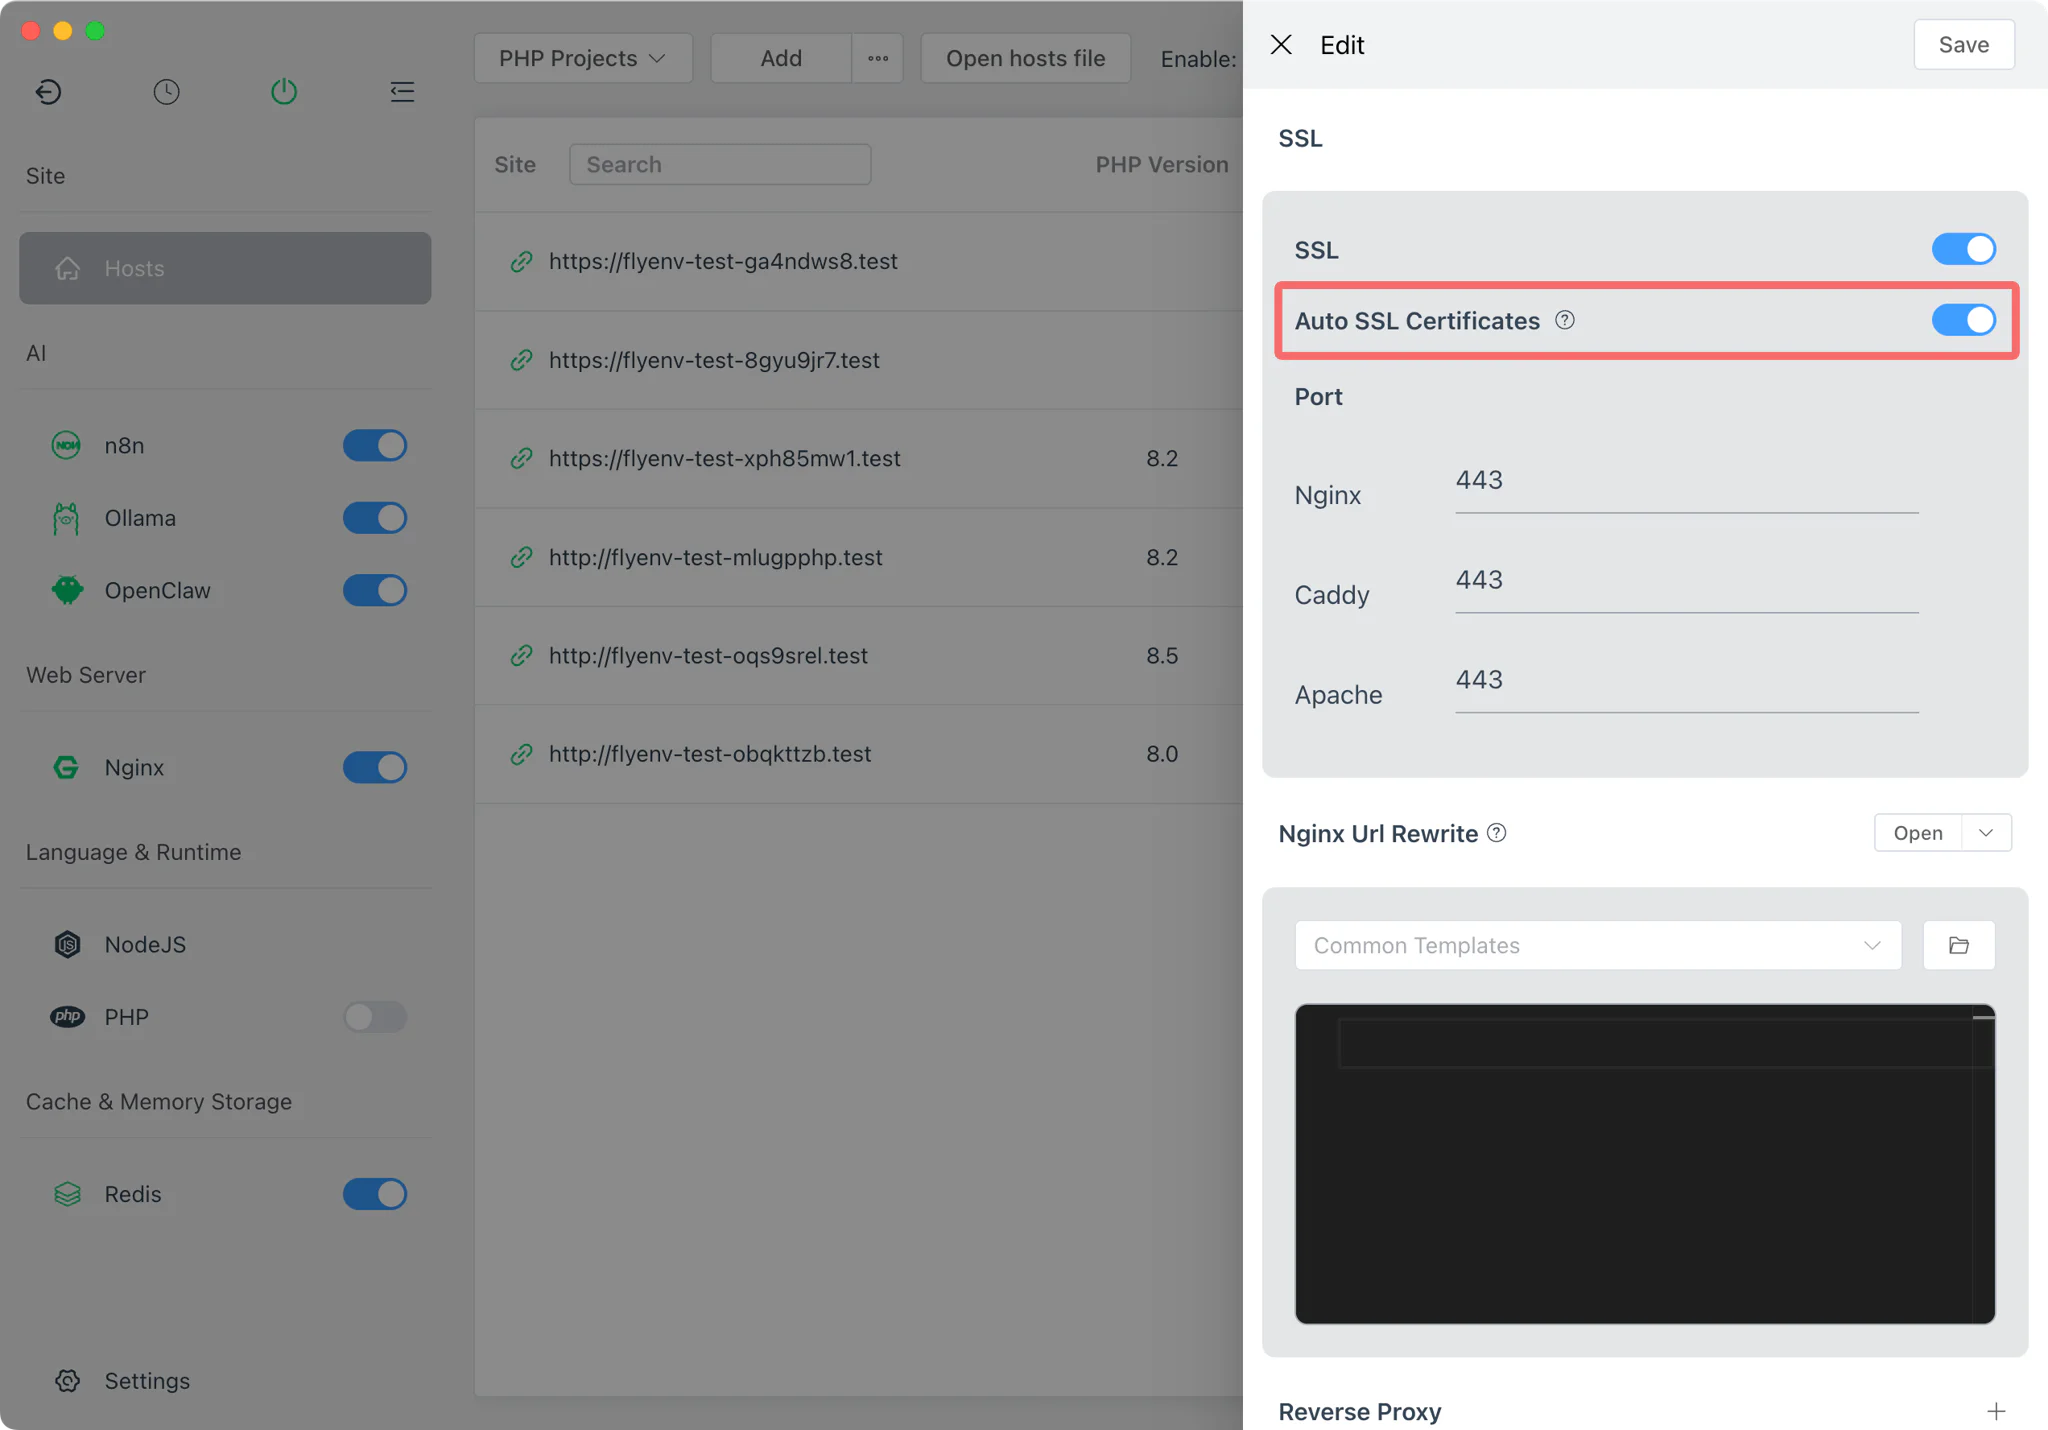
No manual certificate management needed! FlyEnv handles mkcert integration automatically.
Step 5: Expose to Internet with Cloudflare Tunnel
Want to access your AI workflow from anywhere? FlyEnv's integrated Cloudflare Tunnel module provides secure tunneling without opening firewall ports. Unlike ngrok, you get permanent URLs, custom domains, and unlimited bandwidth—for free.
| Feature | ngrok Free | Cloudflare Tunnel |
|---|---|---|
| Custom domains | ❌ Random URLs | ✅ FREE |
| Permanent URLs | ❌ Changes every restart | ✅ FREE |
| Bandwidth limits | 1GB/month | Unlimited FREE |
| Setup in FlyEnv | Manual CLI | One-click UI |
5.1 Get Your Cloudflare API Token
- Log in to Cloudflare Dashboard
- Go to My Profile (top right) → API Tokens
- Click Create Token
- Use the "Cloudflare Tunnel" template, or create custom with these permissions:
- Account:Cloudflare Tunnel:Edit — For managing tunnels
- Zone:Zone:Read — For listing your domains
- Zone:DNS:Edit — For creating DNS records
- Select the Zone Resources (domains) you want to use
- Copy the generated token
Tip: If you don't have a domain, you can register a cheap one or use Cloudflare's free subdomains on some plans.
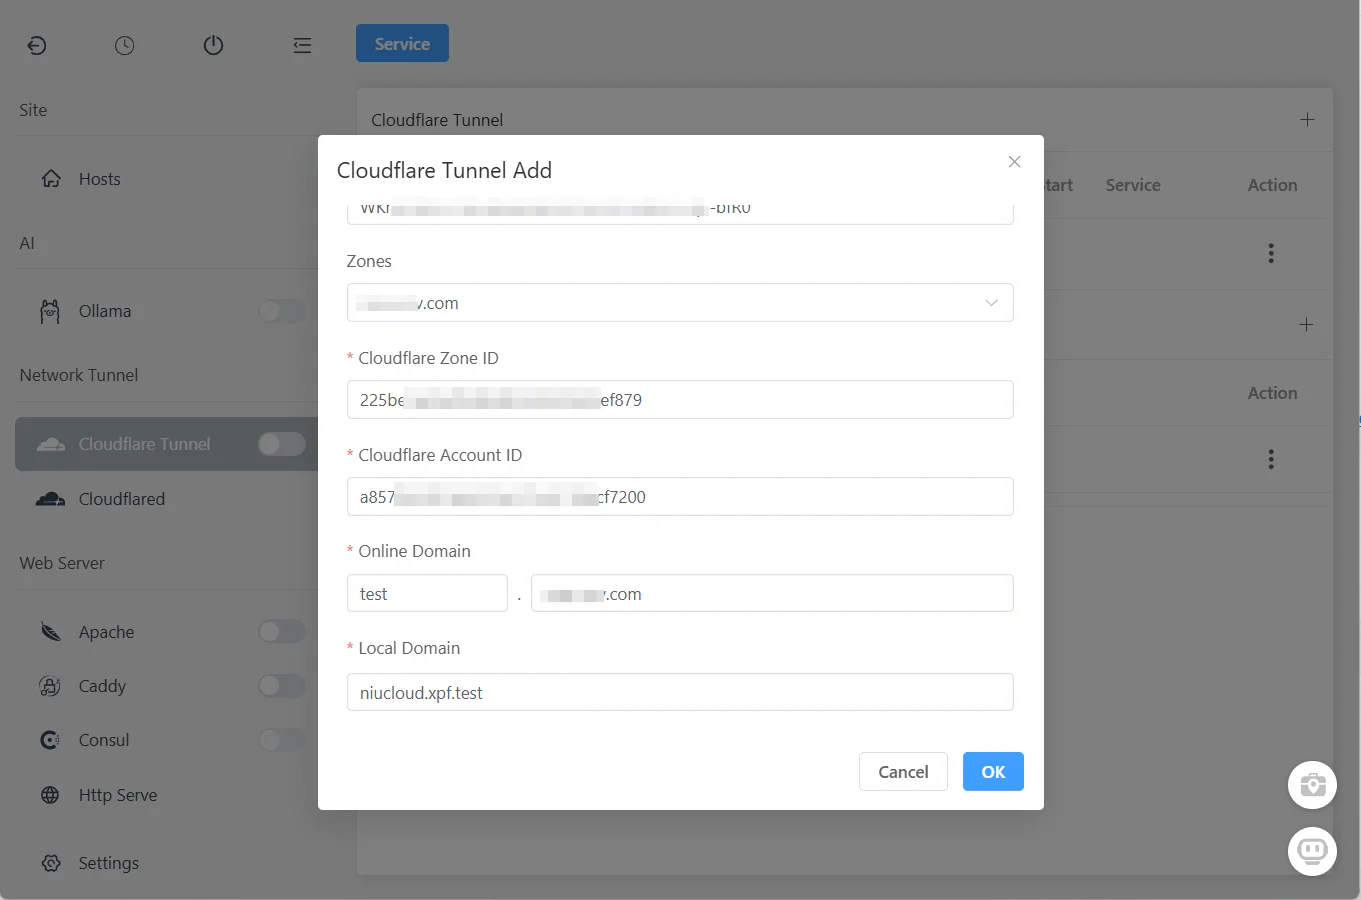
5.2 Configure in FlyEnv
- Open FlyEnv → Cloudflare Tunnel module, click the Plus Icon Button
- Paste your API Token
- FlyEnv automatically fetches your available domains
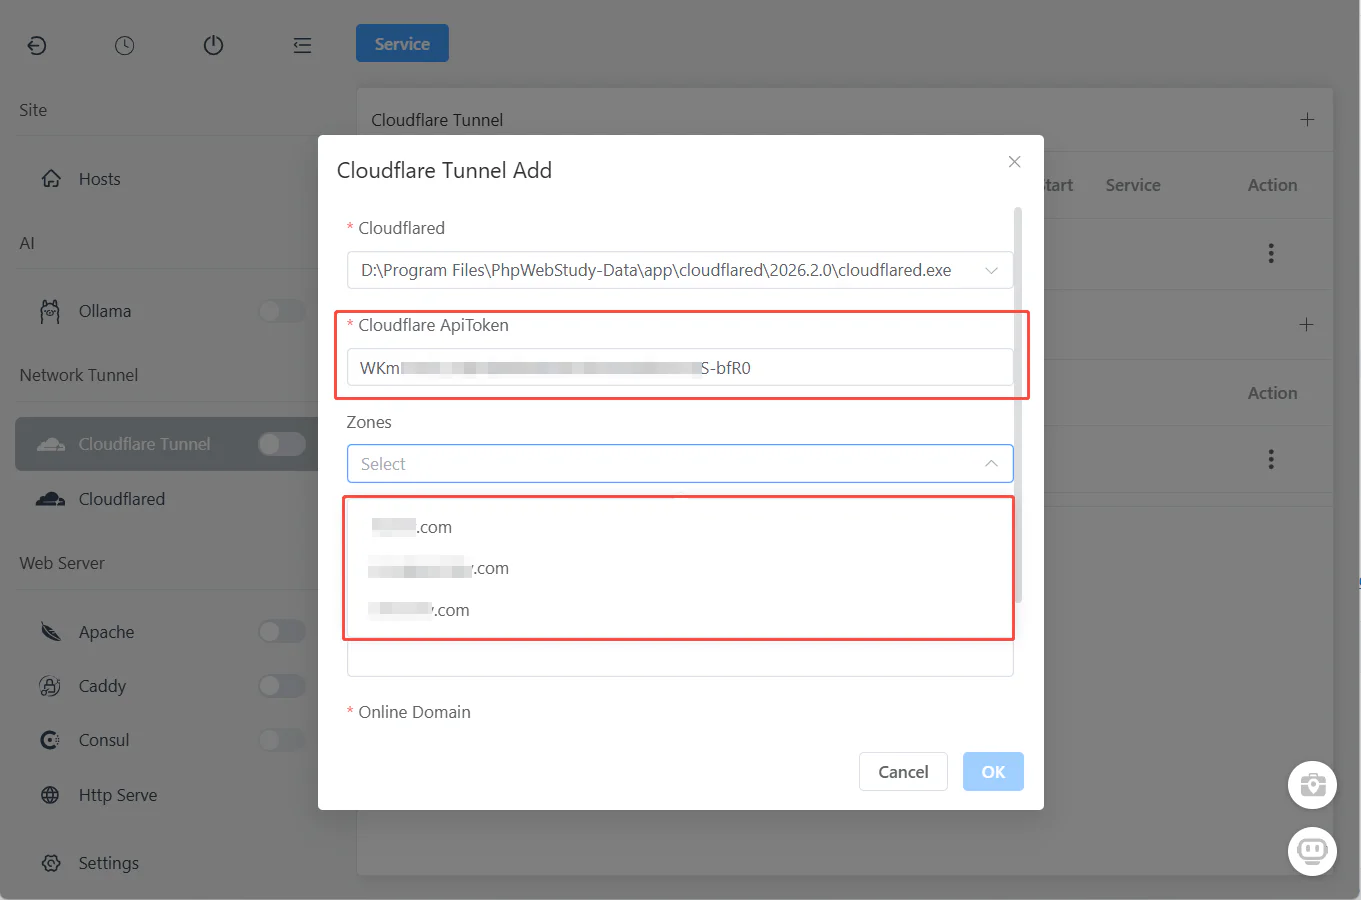
5.3 Create Your Tunnel for n8n
After zones are loaded:
- Select Zone: Choose the domain you want to use (e.g.,
yourdomain.com) - Set Subdomain: Enter your desired subdomain (e.g.,
ai→ createsai.yourdomain.com) - Set Local URL: Enter
http://localhost:5678(n8n's default port) - Click "Ok"
That's it! FlyEnv handles everything internally:
- ✅ Creates the Cloudflare Tunnel
- ✅ Configures DNS records
- ✅ Sets up routing rules
- ✅ Generates SSL certificates
5.4 Start the Tunnel
Click the "Start" button in the Cloudflare Tunnel module.
Your n8n workflow is now accessible at https://ai.yourdomain.com from anywhere in the world via HTTPS—no server deployment, no port forwarding, no complex network configuration.
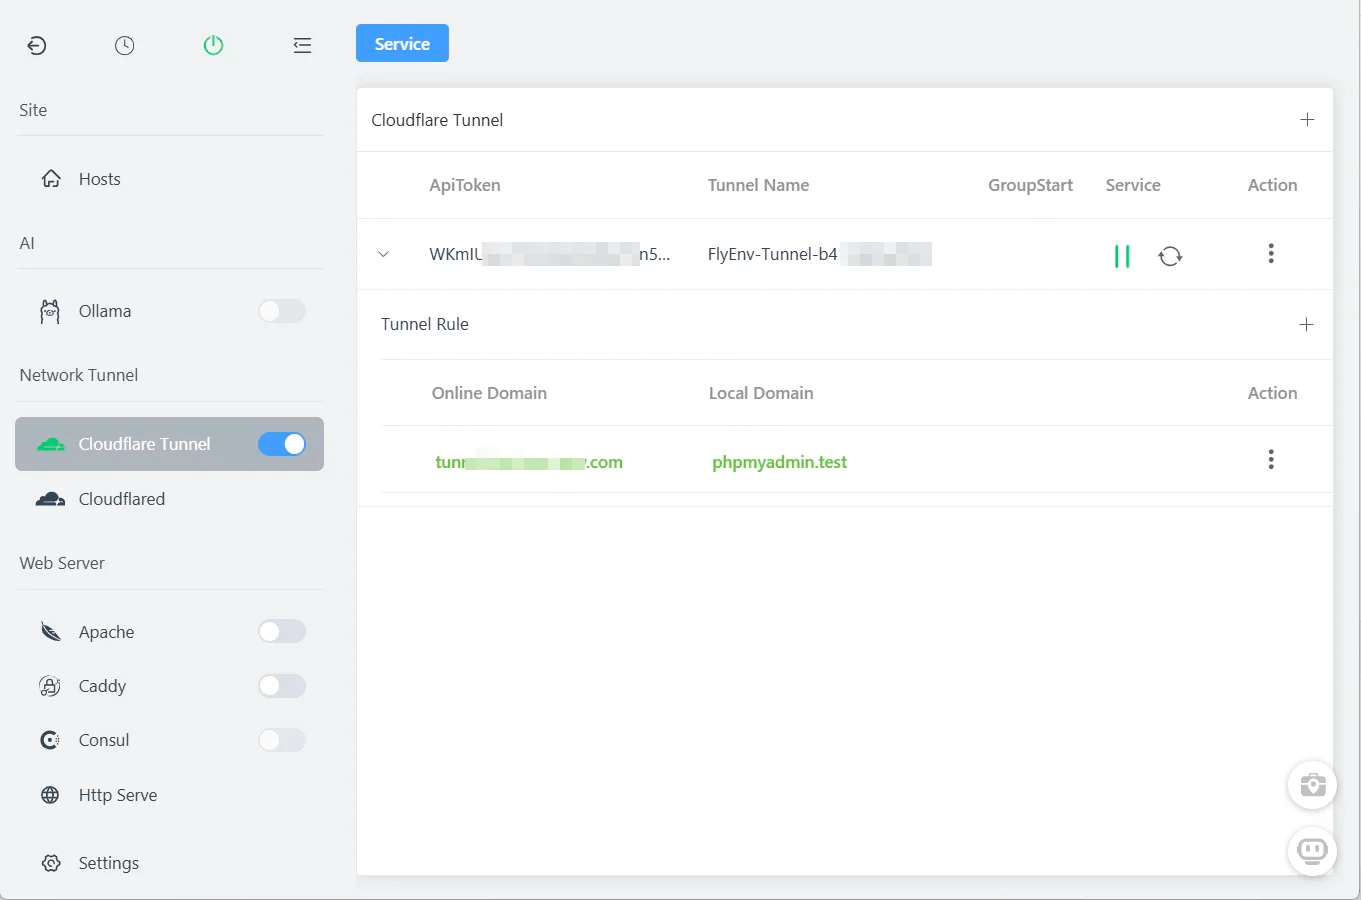
Managing Multiple Tunnels
Create additional tunnels for different workflows or team members:
| Subdomain | Local URL | Purpose |
|---|---|---|
ai | http://localhost:5678 | Main n8n AI workflow |
ai-test | http://localhost:5678 | Testing environment |
webhook | http://localhost:5678/webhook | Public webhook endpoint |
All managed from one interface—start, stop, or delete tunnels with one click.
Advanced Workflow Ideas
Once you have the basic setup working, explore these powerful automation patterns:
Customer Support Analyzer
Connect your CRM or chat platform to n8n, pass conversation history to your local AI, and receive sentiment analysis plus suggested responses—all without sending customer data to external APIs.
Code Review Bot
Trigger workflows from Git webhooks, use DeepSeek Coder to analyze pull requests, and post automated comments with improvement suggestions.
Document Processing Pipeline
Receive documents via email or upload, extract text with local OCR, process through Ollama for summarization or classification, and store results in your database.
Smart Home Integration
Combine with Home Assistant webhooks to create AI-powered automation rules using natural language commands processed entirely locally.
Video Walkthrough
Prefer watching? See Build a 100% Free Self-Hosted AI Workflow: n8n + Ollama (No Docker!) via FlyEnv in action:
Frequently Asked Questions (FAQ)
Does this setup use less RAM than Docker?
Yes. FlyEnv runs n8n and Ollama as native binaries directly on your system. Compared to Docker Desktop + containers, you'll typically see 60-80% lower memory usage. On macOS, Docker Desktop alone consumes 2-4GB just for the VM—FlyEnv has zero overhead.
Can I use this completely offline?
Absolutely. Once n8n and Ollama are installed, the entire workflow runs locally without any internet connection. This is ideal for air-gapped environments or privacy-sensitive applications.
Is n8n with Ollama better than paid automation tools?
For developers and privacy-conscious users: yes. You get unlimited workflows, no usage caps, zero subscription fees, and complete data privacy. The trade-off is self-management, which FlyEnv significantly simplifies.
How does Cloudflare Tunnel compare to ngrok?
Cloudflare Tunnel (via FlyEnv's integration) offers persistent URLs, custom domains, built-in SSL, and is completely free for personal use—unlike ngrok's random URLs and connection limits. Plus, it doesn't require installing additional software beyond FlyEnv.
Can I connect multiple AI models in one workflow?
Yes! n8n supports branching and conditional logic. You could route requests to different Ollama models based on task type—use CodeLlama for programming questions, Qwen for general knowledge, etc.
Next Steps
Your self-hosted AI automation platform is now ready! Here are recommended next steps:
- Explore more AI tools — Learn about building offline AI agents with full RAG capabilities
- Secure your setup — Read the Cloudflare Tunnel guide for production deployment tips
- Download FlyEnv — If you haven't already, get the latest version for your operating system
Have questions or want to share your workflow creations? Join our GitHub Discussions community!